Upcycling everyday items into unique Christmas decorations is a great way to add a personal touch to your festivities. A fun way to prepare for the holidays, upcycling contributes to a more sustainable lifestyle. In this blog, we’ll explore a variety of DIY Christmas crafts that are easy to make and delightful to display.
Jump to:
- How to Make Recycled Christmas Baubles
- How to Make Christmas Decor from Nature
- How to Make Homemade Christmas Ornaments with Things Around the House
- How to Make Wine Corks Crafts
- How to Make DIY Christmas Wreaths
- How to Make Your Own Advent Calendar
- How to Make a DIY Wooden Christmas Tree
- How to Make Tin Can Christmas Crafts
- How to Make a Paper Snowflake Wonderland
- How to Repurpose Old Clothes into Festive Fabrics
- How to Make Glass Jar Christmas Crafts
- How to Make Upcycled Cardboard Creations
- How to Make Handmade Fabric Wreaths
- Eco-Friendly Gift-Wrapping Ideas
Upcycling Christmas Decorations: 14 Craft Ideas
Why buy new when you can transform what you already have into something magical? DIY Recycled Christmas Decorations are a great way to give a new lease of life to items that might otherwise be overlooked. From recycled baubles to wine cork crafts, let’s look at 14 Christmas upcycling ideas for your Christmas crafts:
1. How to Make Recycled Christmas Baubles
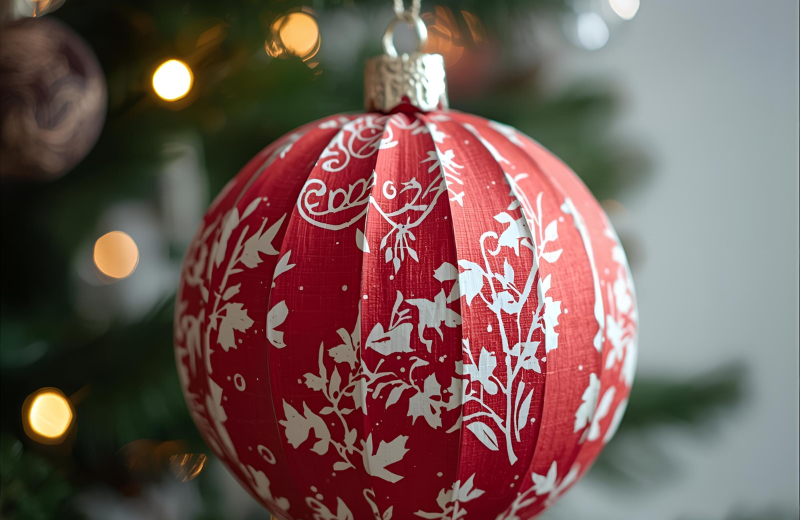
Creating your own Christmas baubles from recycled materials is an environmentally friendly choice and a fantastic way to add a personal touch to your festive decorations. Here’s a simple guide to making these unique ornaments:
Materials Needed:
- Old fabric scraps, paper, or broken jewellery
- Clear craft glue or a hot glue gun
- Scissors
- Old baubles or small balloons
- Ribbon or string for hanging
Steps:
- Prepare Your Base: If you’re using old baubles, ensure they are clean and dust-free. If you don’t have baubles, inflate small balloons to a desired size.
- Cut Your Materials: Cut them into small strips or shapes for fabric or paper. Select pieces that can easily be glued onto a spherical surface if you're using broken jewellery.
- Start Decorating: Apply a thin layer of glue onto the bauble or balloon. Begin placing your fabric, paper, or jewellery pieces onto the surface, pressing gently to ensure they stick. Overlap the pieces slightly for a fuller look.
- Add Layers: Continue to add layers until the entire bauble is covered. You can add additional layers in specific areas for a more textured look.
- Let it Dry: After decorating, set your bauble aside to dry. If you’re using a balloon, wait for the glue to dry before carefully popping and removing the balloon completely.
- Add Finishing Touches: If desired, you can add extra embellishments like glitter, sequins, or additional pieces of jewellery.
- Attach the Ribbon or String: Once your bauble is dry and all embellishments are added, tie a ribbon or string to the top for hanging. You can use the existing loop if you’re upcycling an old bauble.
- Hang Your Creation: Your recycled Christmas bauble is ready to sparkle on your Christmas tree!
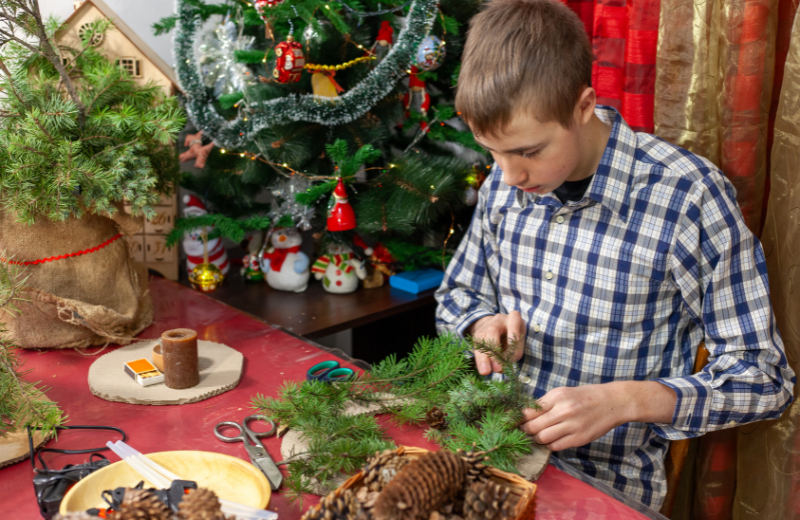
2. How to Make Christmas Decor from Nature

Bringing a piece of nature indoors for Christmas is a nod to the beauty of the natural world and a sustainable way to decorate your home. Here's a simple guide to creating charming nature ornaments from items like pine cones, twigs, and leaves:
Materials Needed:
- Pine cones, twigs, and leaves collected from nature
- Non-toxic craft glue or a hot glue gun
- Natural twine or ribbon for hanging
- Optional: Paint, glitter, or other natural decorations (like dried berries or seeds)
Steps:
- Collect Your Materials: Take a walk in nature and collect pinecones, twigs, leaves, and any other natural materials that catch your eye. Look for a variety of shapes and sizes for diversity in your decorations.
- Prepare and Clean: Once you’ve collected your materials, clean them gently to remove dirt and bugs. Let twigs and pinecones dry in the sun for a day to ensure they’re completely dry.
- Design Your Ornaments: Plan out how you want your ornaments to look. You might keep it simple with a single pinecone or twig or create a small arrangement by combining different elements.
- Attach Twine or Ribbon: Cut a length of twine or ribbon for hanging. Tie it securely around your ornament, creating a loop at the top. For heavier items, you should glue the twine in place.
- Decorate (Optional): If you want to add some extra sparkle, paint your nature ornaments or add a touch of glitter. Be mindful of using eco-friendly and non-toxic materials.
- Arrange Leaves or Smaller Elements: If you’re using leaves or smaller natural items, arrange them aesthetically and glue them onto the larger base (like a pinecone or twig).
- Let it Dry: Once you’ve finished decorating, set your ornaments aside to dry completely.
- Display Your Nature Crafts: Hang your finished ornaments on your Christmas tree, in windows, or any place in your home where you’d like to add a touch of nature’s charm.
3. How to Make Homemade Christmas Ornaments with Things Around the House
You can craft unique and charming ornaments using items you already have around the house. Here's a guide to get you started:
Materials Needed:
- Found items from around the house (e.g., fabric scraps, buttons, old CDs, paper, painted rocks)
- Craft glue or a hot glue gun
- Scissors
- Paints and brushes (optional)
- Ribbon or string for hanging
Steps:
- Gather Your Materials: Look around your house for items that could be transformed into ornaments. This could be fabric scraps, buttons, old CDs, or even rocks you can paint. Be creative!
- Design Your Ornaments: Decide what each item will become. A fabric scrap could turn into a miniature Christmas stocking, a button can be the centre of a snowflake, and a painted rock might become a jolly Santa face.
- Cut and Shape: If you’re using fabric or paper, cut them into the desired shapes. If you’re painting rocks, clean them and let them dry before painting.
- Assemble Your Ornaments: Use glue to assemble your ornaments. For example, attach buttons to a CD to create a sparkling snowflake or sew fabric pieces together to form a stocking.
- Decorate: Add details to your ornaments. Paint faces on rocks, add glitter to your paper crafts, or sew embellishments onto fabric ornaments.
- Attach the Ribbon or String: Cut a length of ribbon or string for hanging. Attach it securely to your ornament. For heavier ornaments, ensure the ribbon is firmly glued or sewn.
- Let it Dry: If you’ve used glue or paint, allow enough time for your ornaments to dry completely.
- Hang Your Creations: Once dry, your homemade ornaments are ready to be displayed. For a festive touch, hang them on your Christmas tree, in windows, or anywhere around your home.
4. How to Make Wine Corks Crafts
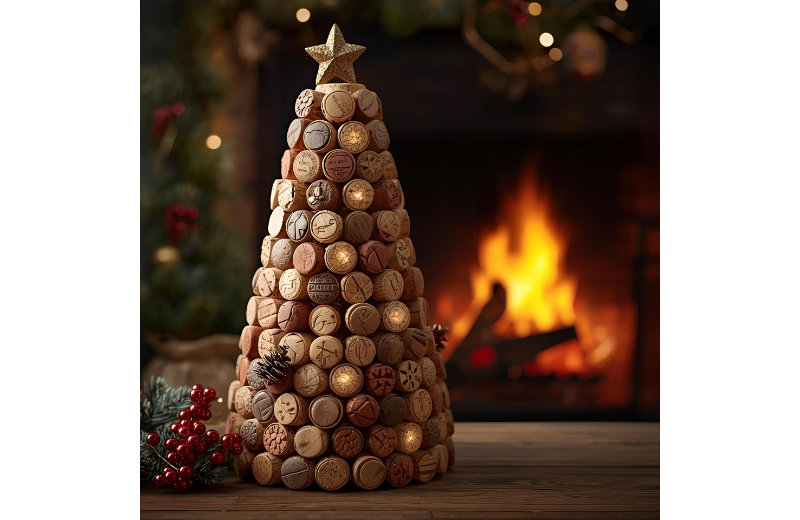
From adorable reindeer to festive ornaments, here's how you can turn leftover wine corks into delightful holiday crafts:
Materials Needed:
- Wine corks
- Craft glue or a hot glue gun
- Scissors
- Small twigs or toothpicks for reindeer antlers
- Decorative items like ribbon, paint, beads, or small pom-poms
Steps:
- Collect Your Corks: Gather a bunch of wine corks. The more you have, the more options you’ll have for crafting.
- Plan Your Designs: Decide what you want to make. Cork reindeer, Christmas trees, and simple ornaments are all great choices. Sketch out your ideas if it helps.
- Create Reindeer: For a cork reindeer, use a full cork for the body. Break small twigs or toothpicks to create antlers and glue them to one end of the cork. Add small beads or draw eyes and a red nose. You can use a smaller cork piece or a pom-pom for the head.
- Make Christmas Trees: To create a Christmas tree, you'll need to cut the corks into thin discs and stack them in a pyramid shape, glueing each layer as you go. You can paint the cork discs green or leave them natural for a rustic look.
- Craft Simple Ornaments: You can leave the cork whole or slice it into discs for basic ornaments. Decorate them with paint glitter, or attach ribbons and beads for added flair.
- Add Hanging Mechanisms: Attach a loop of ribbon or twine to your creations to hang them. For heavier items, ensure the loop is securely glued.
- Decorate Your Crafts: Get creative with your decorations. Paint faces on your reindeer, add mini baubles to your cork trees, or wrap your ornaments in festive ribbons.
- Let Everything Dry: Allow sufficient time for the glue and paint to dry completely.
- Display Your Cork Creations: Once dry, your wine cork crafts are ready to adorn your Christmas tree, mantle, or any other special spot in your home.
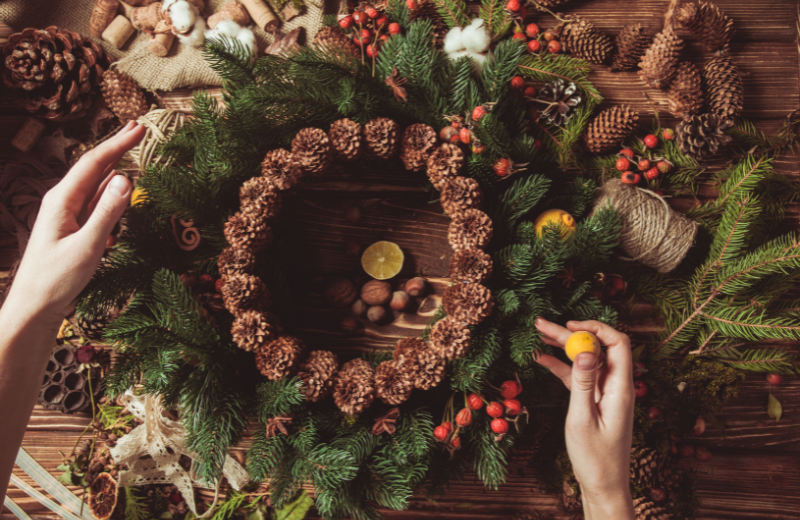
5. How to Make DIY Christmas Wreaths
Creating a DIY Christmas wreath is a fantastic way to add a welcoming touch to your holiday decor. You can craft a unique wreath that reflects your style with upcycled materials like old book pages, fabric scraps, and even recycled plastic bags. Here’s how to get started:
Materials Needed:
- A wreath base (can be made from cardboard, a metal hanger, or a foam ring)
- Old book pages, fabric scraps, or recycled plastic bags
- Craft glue or a hot glue gun
- Scissors
- Ribbon or twine for hanging
- Additional decorations (such as pine cones, dried fruit slices, or ornaments)
Steps:
- Prepare Your Wreath Base: If you’re using a metal hanger, shape it into a circle. For a cardboard base, cut a ring to your desired size. Foam rings can be used as they are.
- Choose Your Material: Decide whether you want to use book pages, fabric scraps, or plastic bags. Each material offers a different look and texture.
- Cut or Tear Your Material: For book pages or plastic bags, tear or cut them into strips. If using fabric, cut it into strips or shapes depending on the design you want.
- Attach the Material to the Base: Attach your material to the wreath base. If using strips, tie them around the base or glue them. Overlap the pieces to create fullness and texture.
- Continue Adding Layers: Keep adding material until the entire base is covered and the wreath looks full and lush.
- Add Decorations: Once the base is covered, you can add decorations like pine cones, dried fruit slices, or small Christmas ornaments. Attach these with glue or wire.
- Create a Hanger: Attach a loop of ribbon or twine to the top of your wreath for hanging.
- Final Touches: Step back and look at your wreath. You might want to adjust or add more decorations until you’re happy with the result.
- Display Your Wreath: Hang your DIY Christmas wreath on your front door, above your fireplace, or any place in your home that could use a touch of festive spirit.
6. How to Make Your Own Advent Calendar
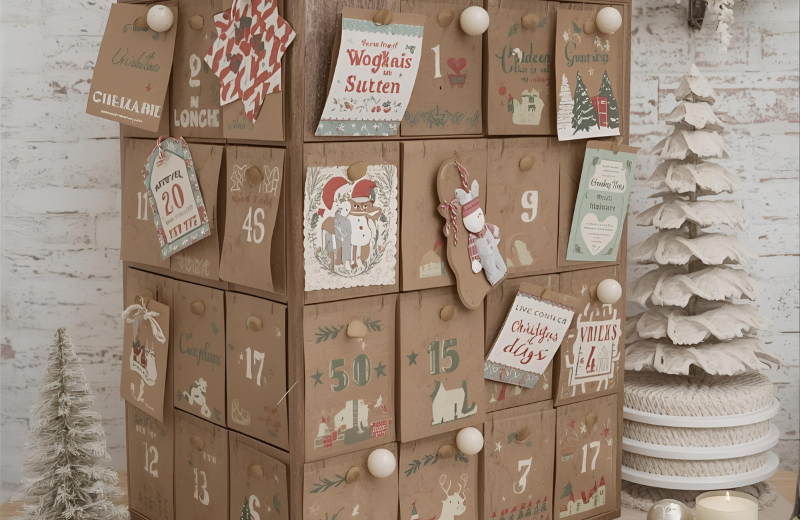
Creating a homemade advent calendar is a delightful way to count down to Christmas. Here’s a simple guide to making your own advent calendar using upcycled goods:
Materials Needed:
- Old matchboxes, small envelopes, or fabric scraps
- A large piece of cardboard or fabric for the base
- Craft glue or a hot glue gun
- Scissors
- Paints, markers, or other decorative items
- Small treats or notes for each day
Steps:
- Prepare Your Base: If you’re using a cardboard or fabric base, cut it to the size you want your calendar to be. This will be the background for your boxes, envelopes, or fabric pockets.
- Gather or Make the Containers: Collect 24 old matchboxes and envelopes, or cut the fabric into squares to make pockets. If you’re using fabric pockets, sew or glue the edges to create a pouch.
- Decorate the Containers: Personalise each matchbox, envelope, or fabric pocket. Number them from 1 to 24 using paints, markers, or stickers. You can decorate them further with festive designs or motifs.
- Attach the Containers to the Base: Arrange the containers on your base. Once you’re happy with the layout, glue them in place. Ensure there’s enough space between each and that they are securely attached.
- Fill the Containers: Place a small treat, toy, or note inside each container. These can be tailored to the recipient's interests, making each day’s reveal special.
- Add Final Decorations: If desired, add additional decorations to the base of your calendar. This could include painting festive scenes, glueing on extra embellishments, or attaching a border.
- Create a Hanging Mechanism: Attach a ribbon or string to the top of your calendar to be hung up. Make sure it’s strong enough to support the weight of the calendar.
- Display Your Advent Calendar: Find the perfect spot in your home for your calendar, where it can be easily accessed each day.
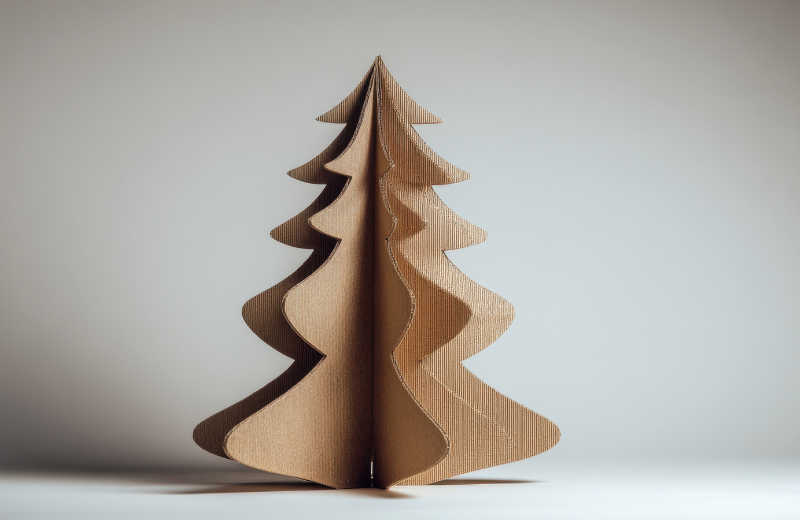
7. How to Make a DIY Wooden Christmas Tree
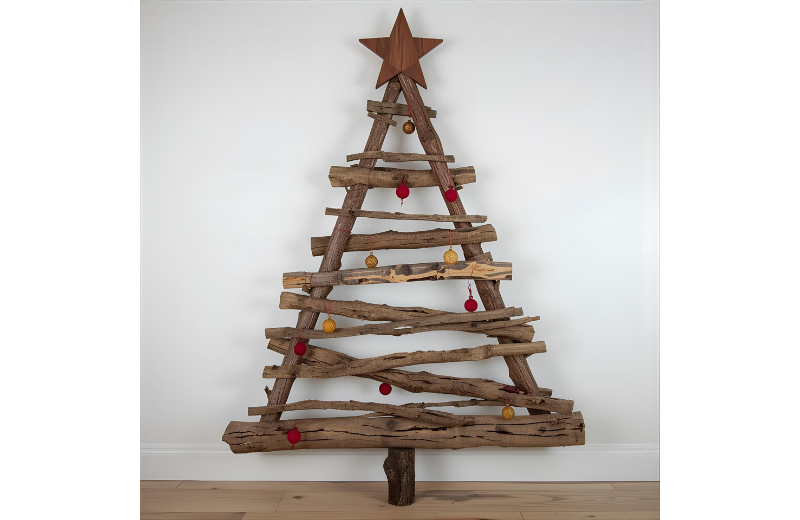
If you appreciate a minimalist and sustainable approach to holiday décor, this craft is for you. Using reclaimed wood or fallen branches, you can create a unique tree that can become a festive focal point for years to come. Here’s how to do it:
Materials Needed:
- Reclaimed wood planks or fallen tree branches
- Saw (hand saw or power saw, depending on wood thickness)
- Sandpaper
- Wood glue or screws (depending on your preference and the tools available)
- Drill (if using screws)
- Paint or wood stain (optional)
- Decorations (lights, ornaments, etc.)
Steps:
- Gather Your Wood: Collect enough reclaimed wood planks or branches to create your tree. The amount will depend on the desired size of your tree.
- Design Your Tree: Decide on the shape and size of your tree. A simple and popular design is a triangular shape, with horizontal planks or branches laid across a vertical 'trunk'.
- Cut the Wood: Cut your planks or branches to the desired lengths. The pieces should decrease in length as they go up the tree to create a triangular shape.
- Sand the Wood: Sand down all the pieces to remove rough edges and splinters. This step is important for a polished look and safe handling.
- Assemble the Tree: Lay out your pieces in the tree shape. Attach each branch or plank to your vertical trunk piece. You can use wood glue for a clean look or screws for added strength. Make sure each piece is level and evenly spaced.
- Paint or Stain (Optional): If desired, paint or stain your tree. This can add colour or enhance the natural beauty of the wood.
- Let it Dry: If you’ve painted or stained the tree, allow ample time to dry completely.
- Add a Base: Attach a sturdy base to make your tree stand. This could be a flat piece of wood or a cross-shaped stand.
- Decorate Your Tree: Once assembled and dry, decorate your wooden tree with lights, ornaments, and any other festive decorations you like.
- Display Your Tree: Choose a special place in your home for your DIY wooden Christmas tree and enjoy the warmth and charm it brings to your festive decor.
8. How to Make Tin Can Christmas Crafts
From lanterns to mini Christmas trees, here’s how you can transform old tin cans into charming holiday pieces:
Materials Needed:
- Empty tin cans (various sizes)
- Hammer and nails or a drill (for making holes)
- Paint (spray paint or acrylic)
- Ribbons, twine, or glitter for decoration
- Candles or LED lights (for lanterns)
- Safety gloves
Steps:
- Prepare Your Tin Cans: Clean the tin cans thoroughly and remove any labels. Make sure there are no sharp edges. Wearing safety gloves during this process is recommended.
- Design Your Pattern: Decide on the design you want to create with holes in the can. This could be simple dots, stars, or even a silhouette of Christmas trees.
- Punch Holes in the Can: Carefully create holes following your design using a hammer and nail or a drill. Make sure to do this step on a sturdy surface.
- Paint the Cans: Once you’ve made your holes, paint the cans in festive colours. Spray paint gives a smooth finish, but acrylic paint works well too. You might need to apply a couple of coats for an even finish.
- Decorate Your Can: After the paint dries, add further decorations like ribbons, twine, or a dusting of glitter. This is where you can get creative and give each can its own personality.
- Create Lanterns or Candle Holders: If making lanterns or candle holders, place a candle or LED light inside the can. The light shining through the holes will create a beautiful pattern.
- Make a Mini Christmas Tree: For a mini tree, stack several cans in a pyramid shape and glue them together. Decorate the tree with small ornaments, glitter, or paint.
- Let Everything Dry: Ensure all paint and glue are completely dry before moving to the next step.
- Display Your Crafts: Place your tin can crafts in your home. Lanterns and candle holders look great on tables or mantelpieces, while mini Christmas trees can be a cute addition to your desk or shelf.
9. How to Make a Paper Snowflake Wonderland
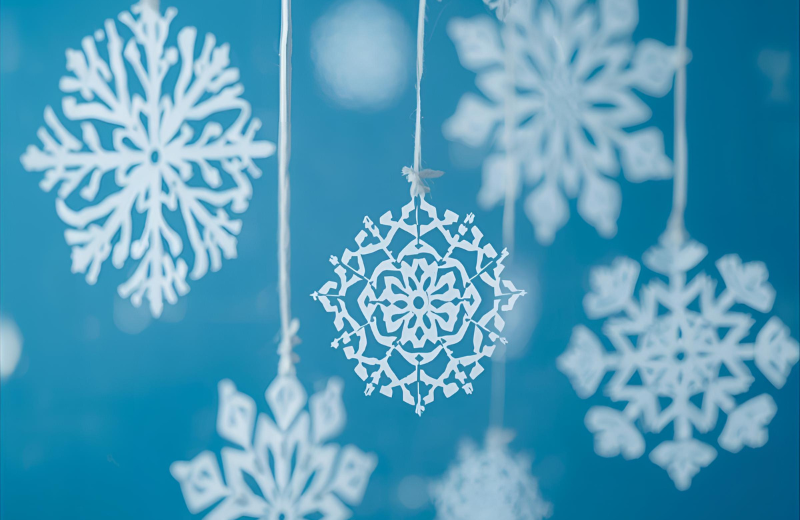
Creating a paper snowflake wonderland is a charming and simple way to bring the magic of winter indoors. These delicate snowflakes can be as intricate or straightforward as you like and are perfect for decorating windows, walls, or even the Christmas tree. Here’s how to craft your own snowflake display:
Materials Needed:
- Plain white paper or lightweight craft paper
- Scissors
- Optional: Glitter, markers, or watercolours for decoration
- String or thread for hanging
- Tape or pins for attaching to surfaces
Steps:
- Prepare Your Paper: Start with a square piece of paper. If your paper is rectangular, fold diagonally and cut off the excess to create a square.
- Fold the Paper: Fold your square in half diagonally to form a triangle. Then, fold it in half again to make a smaller triangle. For more intricate snowflakes, you can fold the triangle into thirds.
- Cut Your Design: With the paper folded, cut small shapes from the sides and the open edge. You can cut out triangles, circles, or any pattern you like. The sections you remove will create the design of your snowflake.
- Unfold Your Snowflake: Carefully unfold the paper to reveal your snowflake design. Flatten it out gently to make it easier to display.
- Decorate (Optional): If you want to add some sparkle or colour, you can decorate your snowflakes with glitter, markers, or a light wash of watercolour.
- Prepare for Hanging: If you wish to hang your snowflakes, attach a piece of string or thread to one point of the snowflake.
- Create a Collection: Repeat the process to create as many snowflakes as possible. Each one can be a different design for variety.
- Display Your Snowflakes: Hang your snowflakes from the ceiling, tape them to your windows, or attach them to your walls. You can also hang them on your Christmas tree as lightweight ornaments.
- Enjoy Your Winter Wonderland: Step back and enjoy the serene beauty of your handmade paper snowflake wonderland.
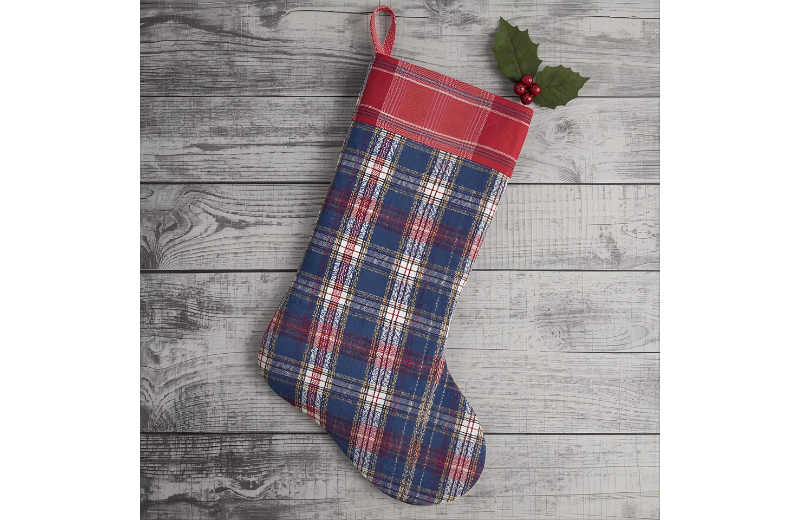
10. How to Repurpose Old Clothes into Festive Fabrics
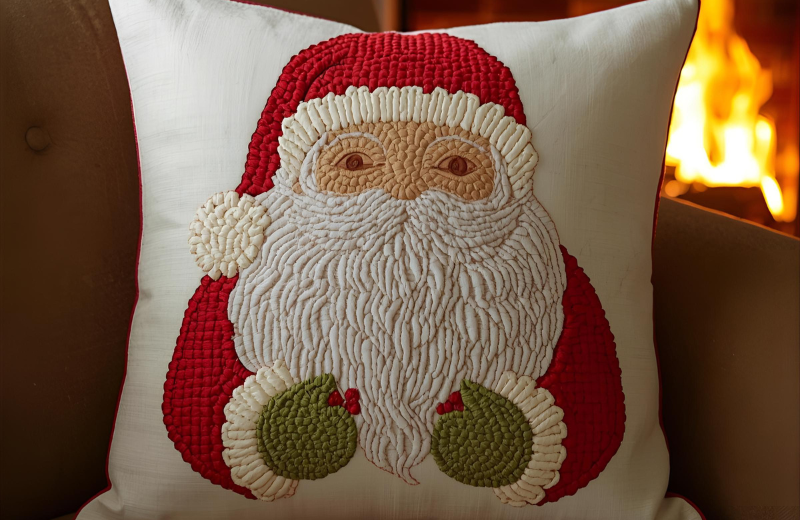
From patchwork tree skirts to cosy cushion covers, here’s how you can repurpose old garments into charming Christmas decorations:
Materials Needed:
- Old clothes (preferably in festive colours or patterns)
- Scissors
- Sewing machine or needle and thread
- Measuring tape
- Fabric glue (optional)
- Additional decorations like ribbons, buttons, or lace
Steps:
- Select Your Clothes: Choose old clothes with colours or patterns that fit the festive theme. Think reds, greens, plaids, or any fabric that feels Christmassy.
- Plan Your Project: Decide what you want to make. A patchwork tree skirt, bunting, or cushion cover are great options. Sketch out your design to guide your work.
- Cut the Fabric: Cut your selected clothes into the required shapes and sizes; squares or triangles work well for a patchwork design. For bunting, you might cut out triangles or flags.
- Arrange Your Design: Lay your fabric pieces on a flat surface to finalise your design. This step is particularly important for patchwork projects to ensure a pleasing arrangement of colours and patterns.
- Sew the Pieces Together: Stitch your fabric pieces together. If you’re making a patchwork item, sew the pieces into rows first, then sew the rows together. For bunting, sew the flags onto a long ribbon or string.
- Add Embellishments: Personalise your creation with additional decorations. Sew on ribbons, lace, or buttons for extra flair.
- Finish Your Project: If making a cushion cover, sew the sides together, leaving a gap to insert a cushion. For a tree skirt, add ties or Velcro to secure it around the base of your tree.
- Display Your Festive Fabrics: Place your homemade decoration in its designated spot. Whether it’s a tree skirt under your Christmas tree, bunting across your mantle, or a festive cushion on your sofa, it’s sure to add a special touch to your holiday decor.
11. How to Make Glass Jar Christmas Crafts
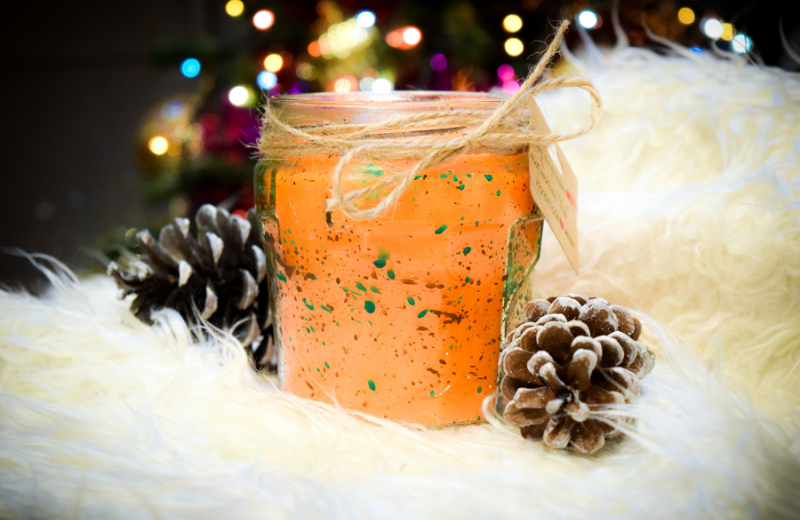
Glass jars offer a world of possibilities for Christmas crafting. They can be transformed into elegant candle holders, festive vases, or charming containers for homemade gifts. Here’s a guide to creating beautiful glass jar crafts for the holiday season:
Materials Needed:
- Glass jars of various sizes
- Paints (acrylic or glass paint) and brushes
- Ribbons, twine, or lace
- Small candles or LED fairy lights (Discover how to make your own candles)
- Optional: Glitter, stickers, or other decorative items
- Homemade treats or small gifts (if using jars as gift containers)
Steps:
- Prepare Your Jars: Start with clean, label-free glass jars. Remove any residue from labels with warm, soapy water.
- Paint Your Jars: If you’re painting your jars, use acrylic or glass paint to create festive designs. You can paint the entire jar or create patterns like snowflakes, stars, or Christmas trees.
- Add Decorations: You can add further embellishments once the paint is dry. Wrap ribbons or twine around the neck of the jar, attach lace for a vintage look, or apply stickers for added charm.
- Fill with Lights or Candles: Place small Christmas candles or LED fairy lights inside the jars for a luminous effect. The light flickering through the painted designs creates a warm and inviting glow.
- Create Gift Jars: If using the jars for homemade gifts, fill them with treats like cookies, homemade jam, or hot cocoa mix. You can also add a personal touch with a handwritten recipe or message.
- Seal the Jars: Close the jars with their original lids, or if you’re feeling crafty, create custom lids using fabric or decorative paper.
- Add Finishing Touches: You should add a final flourish with a ribbon or a custom label, especially if the jars are intended as gifts.
- Display or Gift Your Jars: Place your decorated jars around your home as part of your holiday decor, or give them as thoughtful, handcrafted gifts.
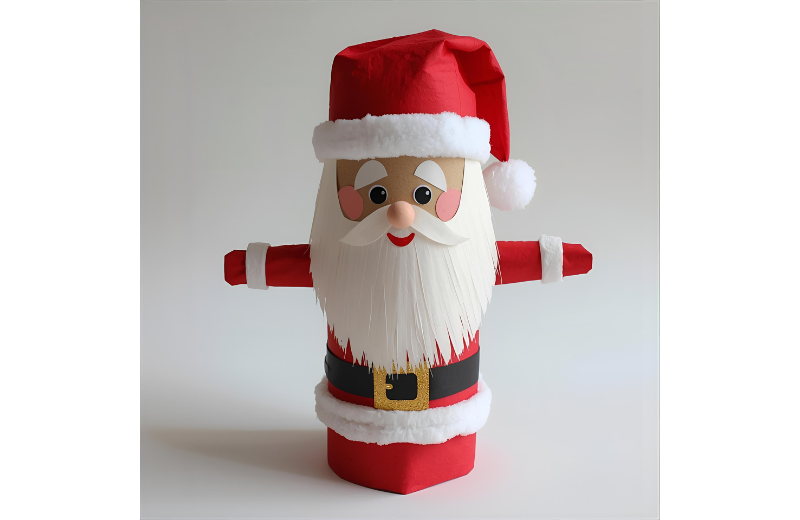
12. How to Make Upcycled Cardboard Creations
Cardboard, often readily available and sturdy, is an excellent material for creating a variety of upcycled Christmas decorations. From 3D stars to a mock fireplace, the possibilities are endless. Here's a guide to crafting with cardboard this festive season:
Materials Needed:
- Cardboard boxes
- Scissors or a craft knife
- Ruler or a straight edge
- Pencil for marking
- Paint and brushes
- Glue or strong tape
- Additional decorations (like glitter, fabric, or paper for covering)
Steps:
- Gather Your Cardboard: Collect various sizes of cardboard boxes. Thicker cardboard is ideal for projects that require more structural integrity.
- Design Your Project: Decide what you want to create. For a 3D star, you'll need to cut out star shapes. For a mock fireplace, plan the size and shape.
- Mark and Cut: Use a pencil and ruler to mark your design on the cardboard. Then, carefully cut out the shapes using scissors or a craft knife.
- Assemble Your Creation: If you're making a 3D object, like a star or fireplace, fold and glue the cardboard to create your structure. Tape or glue can be used to secure the pieces together.
- Paint and Decorate: Once your structure is complete, paint it in festive colours. For a fireplace, shades of red and brown work well. For stars, metallic paint can add a festive shimmer.
- Add Details: Once the paint is dry, add additional decorative elements. You might glue on glitter, cover parts in fabric or decorative paper, or attach other embellishments.
- Construct Supporting Elements: For larger structures, like a fireplace, ensure you have a base or support to keep it upright.
- Display Your Cardboard Craft: Place your finished creation in a prominent spot in your home. A cardboard fireplace can be a cosy focal point, while stars can hang from the ceiling or be placed on shelves.
13. How to Make Handmade Fabric Wreaths
Move over, traditional green wreaths! Handmade fabric wreaths are a creative, colourful alternative and a fantastic way to use leftover fabric scraps. Here’s how to create your own fabric wreath:
Materials Needed:
- A wreath base (this can be made from wire, foam, or even a bent coat hanger)
- Fabric scraps in various colours and patterns
- Scissors
- Ribbon or twine for hanging
- Optional: Additional decorations like buttons, lace, or small ornaments
Steps:
- Prepare Your Wreath Base: Choose your wreath base. Foam and wire bases are available at craft stores, or you can bend a coat hanger into a circle for a DIY approach.
- Cut Your Fabric: Cut your fabric scraps into strips. The width and length can vary depending on the look you’re going for, but generally, strips of about 1-2 inches wide and 6-8 inches long work well.
- Tie the Fabric Strips: Tie the fabric strips around the wreath base. Depending on your preferred style, you can use a single knot or a bow. Push the strips close together to ensure the base is fully covered and the wreath looks full.
- Mix Colours and Patterns: Alternate colours and patterns as you tie the strips to create an eclectic and vibrant look. You can follow a specific colour scheme or use a more random, colourful approach.
- Add Decorations (Optional): Once your wreath is covered in fabric, you can add additional decorations. Sew or glue on buttons, lace, or attach small Christmas ornaments to enhance the wreath’s festive appeal.
- Create a Hanger: Attach a loop of ribbon or twine to the top of your wreath for hanging. Make sure it’s securely attached, especially if the wreath is heavy.
- Display Your Wreath: Hang your handmade fabric wreath on your front door, above a fireplace, or on a wall to add a unique and personal touch to your holiday decor.
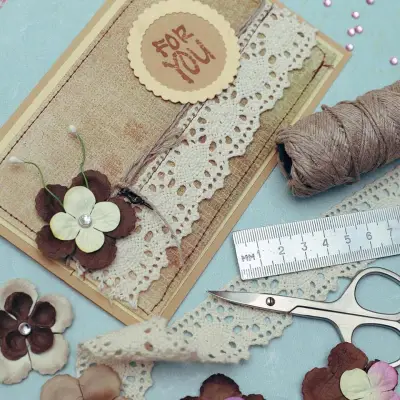
14. Eco-Friendly Gift-Wrapping Ideas
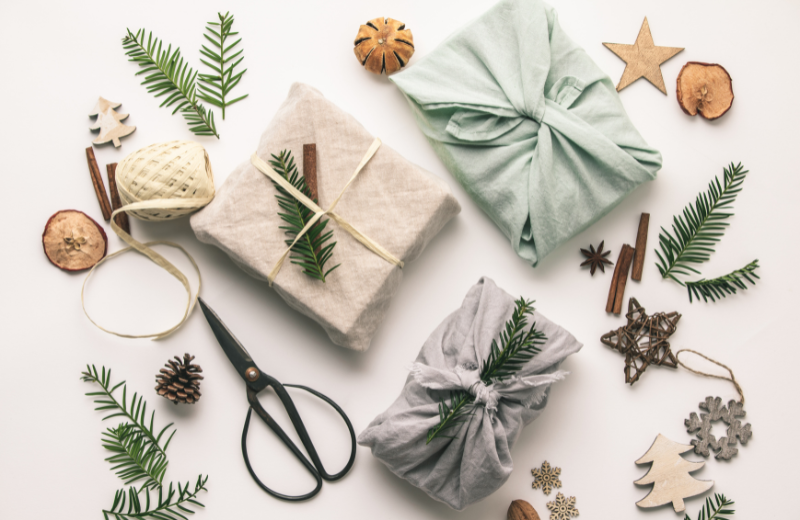
Eco-friendly gift wrapping is a thoughtful way to present your gifts while being kind to the environment. Using materials like old newspapers, fabric scraps, or children’s artwork adds a unique and personal touch to your gifts. Here’s a guide to eco-friendly gift wrapping:
Materials Needed:
- Old newspapers, fabric scraps, or children’s artwork
- Twine or ribbon (preferably made from natural materials)
- Biodegradable tape or fabric glue
- Scissors
- Optional: Natural elements for decoration (like pine cones, dried orange slices, or twigs)
Steps:
- Choose Your Wrapping Material: Select the material you’ll use to wrap your gifts. Newspapers are great for a vintage look, fabric adds a luxurious touch, and children’s artwork brings a personal and colourful element.
- Measure and Cut: Measure the material against your gift to ensure you have enough to cover it completely. Cut the material to size.
- Wrap the Gift: Place your gift on the material and wrap it as you would with traditional wrapping paper. If you’re using fabric, you might want to try the Japanese Furoshiki method of fabric wrapping.
- Secure the Wrap: Use biodegradable tape or fabric glue to secure the wrapping in place. If you’re using fabric, you can often tie it securely without needing adhesives.
- Add Twine or Ribbon: Wrap twine or ribbon around the gift for extra security and aesthetic appeal. You can tie it in a bow or knot for a rustic look.
- Decorate Your Gift: Add natural elements like pine cones, dried orange slices, or small twigs to your gift for an extra festive touch. These can be tied into the twine or glued onto the wrapping.
- Label Your Gift: If needed, add a gift tag. You can make your own tags from recycled materials or small pieces of leftover wrapping material.
- Present Your Eco-Friendly Gift: Give your beautifully wrapped gift with pride, knowing you’ve created something special while reducing waste. Finish with a homemade card.
Recommended for you!
Best Sellers


Upcycling Empowerment with Centre of Excellence
Take your upcycling skills to the next level with our Upcycling Diploma Course, providing innovative ideas to transform everyday items into treasures. Alternatively, our Christmas Crafts and Baking Diploma Course will help get you in the Christmas spirit. Whether you’re a beginner or an experienced crafter, these courses will empower you to unleash your creativity in new and exciting ways.
For a limited time, you can enrol in these courses for just £29, saving you over £100! Don’t miss out on this fantastic offer.