Back pain, especially in the lower back, is common for many. Fortunately, yoga offers a gentle and effective natural remedy for back pain. This blog post will guide you through simple, powerful yoga poses you can do at home for lower back pain relief.
Jump to:
What type of yoga is best for back pain?
For back pain relief, the best type of yoga is typically a gentle, refreshing style, such as Hatha or Iyengar Yoga. These forms focus on slow movements, mindful breathing, and proper alignment, making them ideal for safely stretching and strengthening the back. They allow for props like blocks and straps to help reduce strain and support the back.
What you’ll need
One of the best things about yoga is that you don’t need expensive exercise equipment to get started. You’ll simply need a yoga mat or a comfortable surface for these poses. A rolled blanket or cushion is optional to help with certain poses.
1. Child's Pose (Balasana)
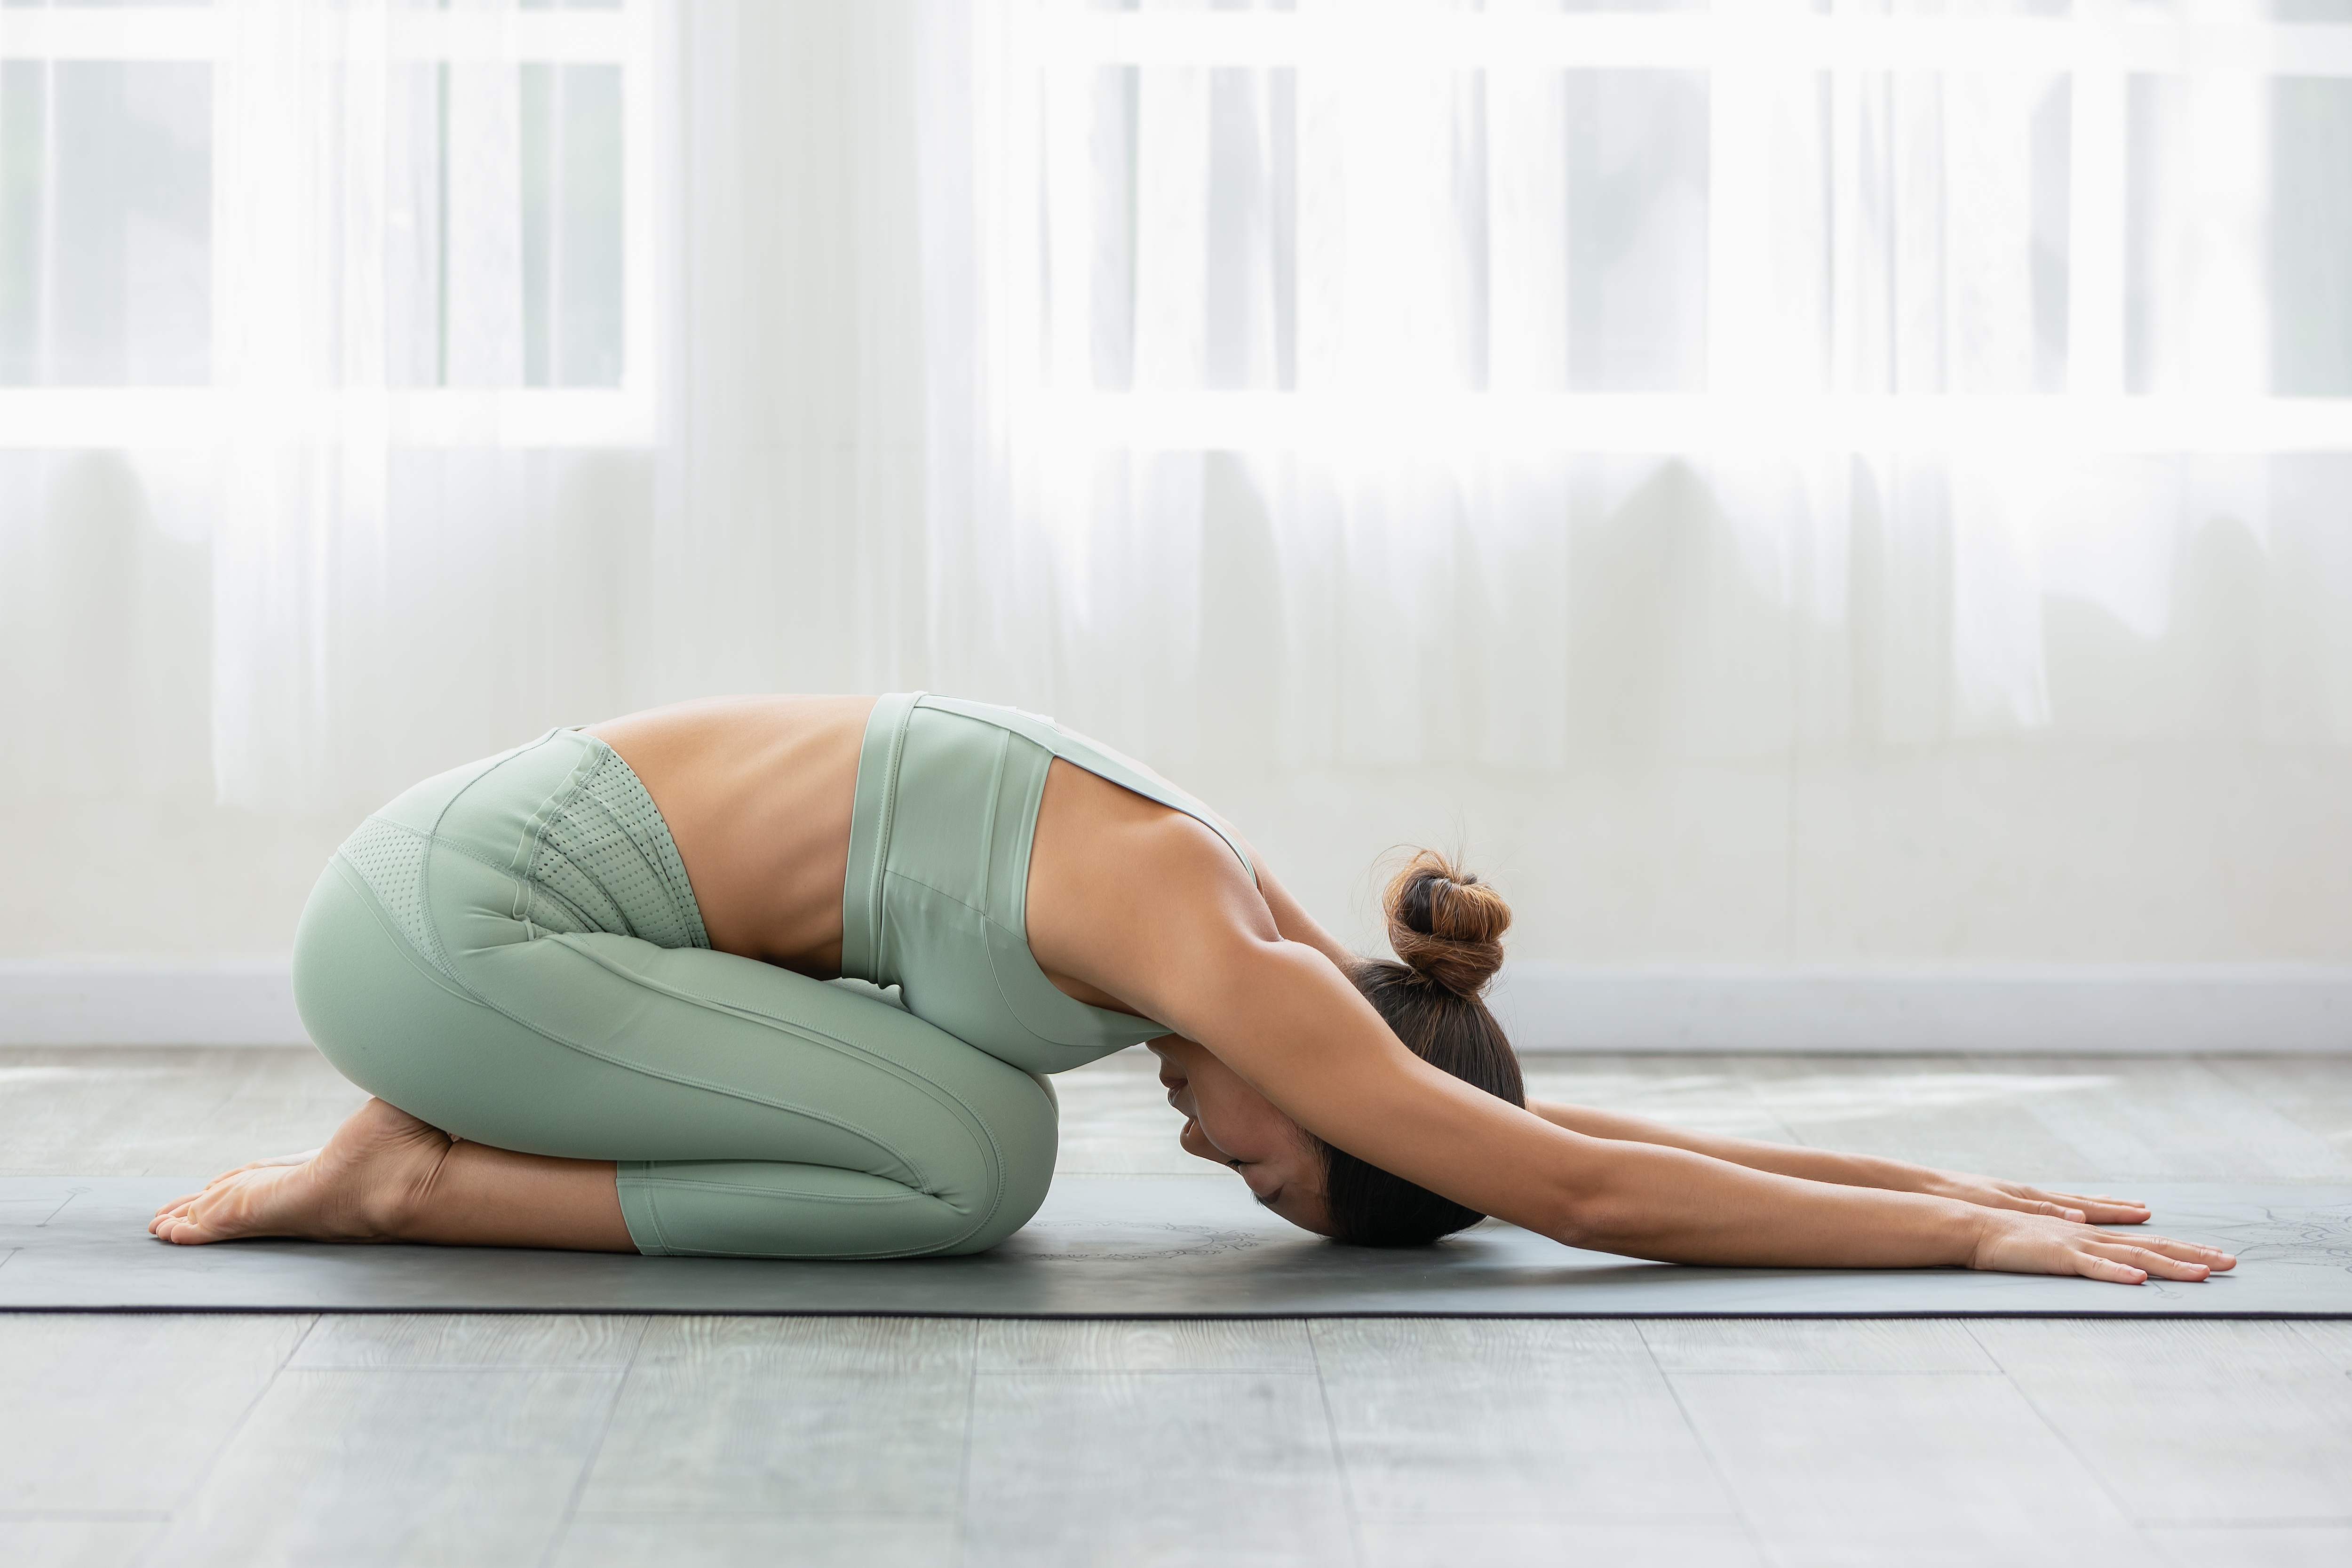
This pose is a classic example of lower-back yoga, providing a natural, soothing stretch to relieve lower back discomfort. It comforts those suffering from lower back pain as it helps elongate and align the spine, reducing tension and discomfort. This restorative pose also calms the mind and relieves stress, and regular practice can improve flexibility in the spine and hips, enhancing overall back health.
How to Do It:
- Begin by kneeling on a comfortable yoga mat. Ensure your knees are either together or slightly apart, depending on what feels most comfortable for your body.
- Slowly sit back on your heels. This initial position helps start the stretch and prepares your body for the pose.
- Gently bend forward from your hips, extending your arms straight in front of you on the mat. Your hands should be shoulder-width apart, fingers spread wide, reaching out as if trying to touch the wall in front of you.
- Allow your forehead to gently rest on the mat. If your forehead doesn't comfortably reach the mat, you can use a yoga block or a folded blanket for support.
- Close your eyes and focus on your breathing. Inhale deeply, expanding your back and ribs, and exhale slowly, allowing your body to sink deeper into the pose.
- Hold this position for 30 seconds to a few minutes, depending on your comfort level. Try to release tension in your back, shoulders, and neck with each exhale.
2. Cat-Cow Stretch (Marjaryasana-Bitilasana)
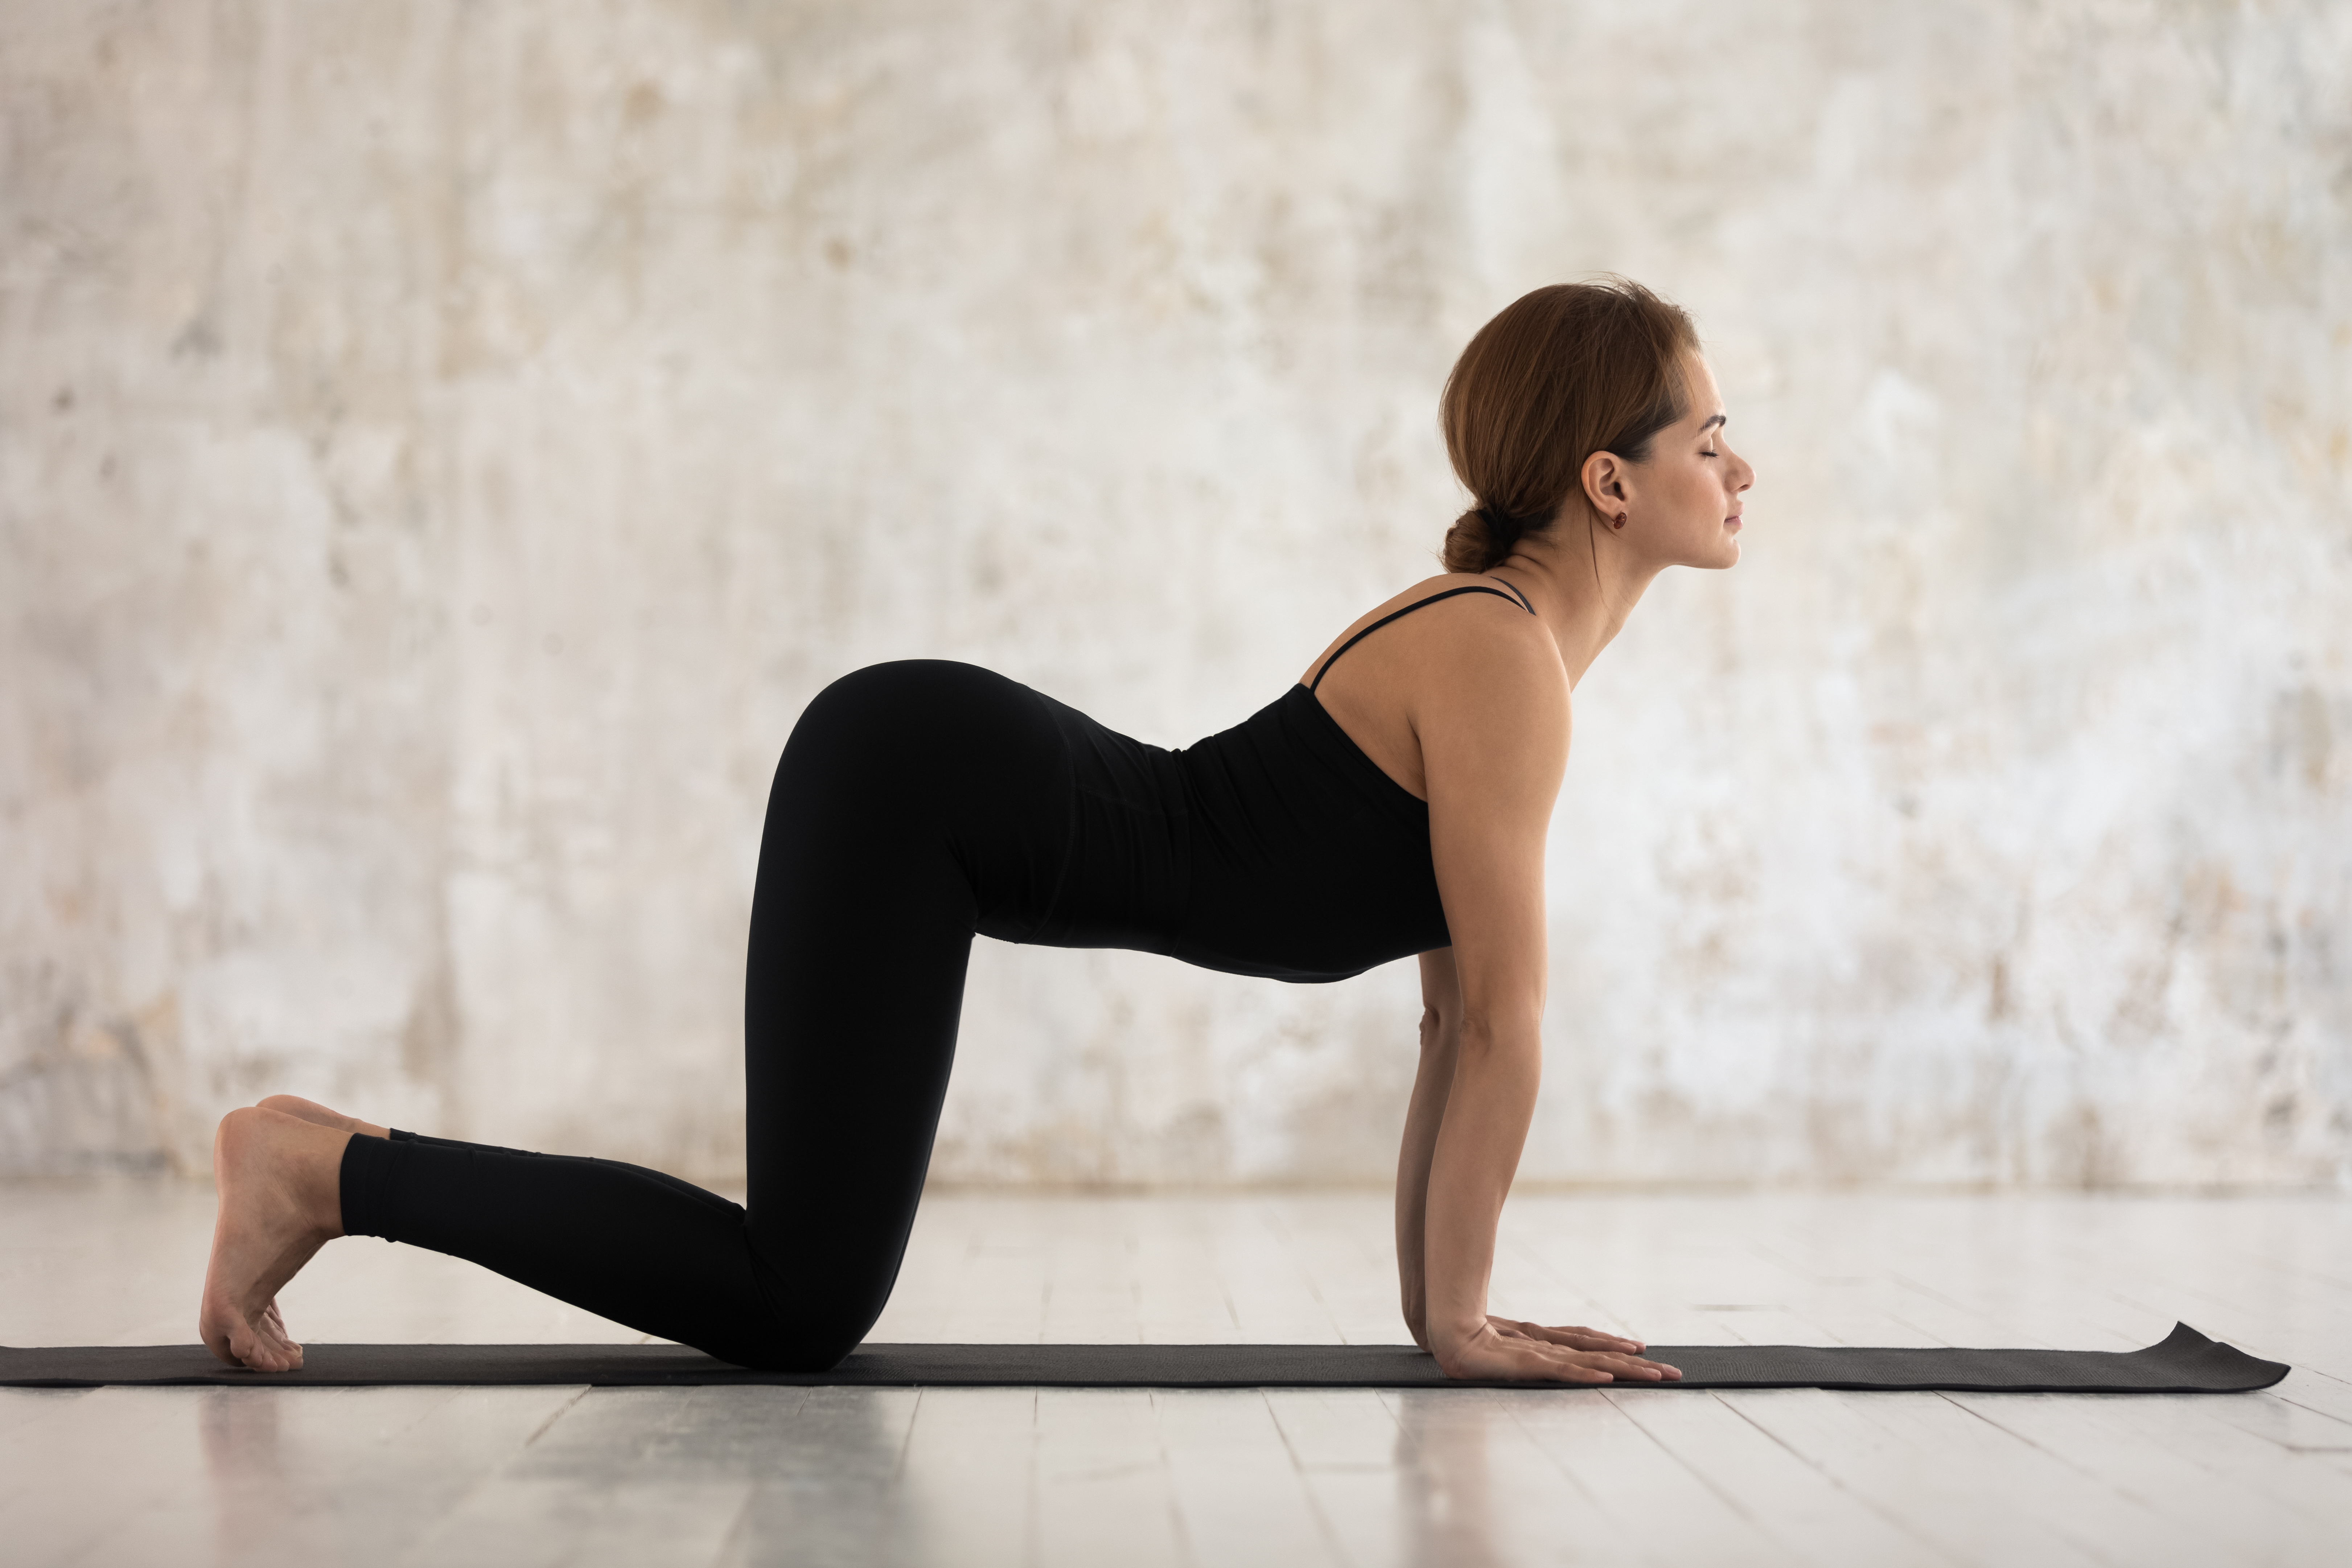
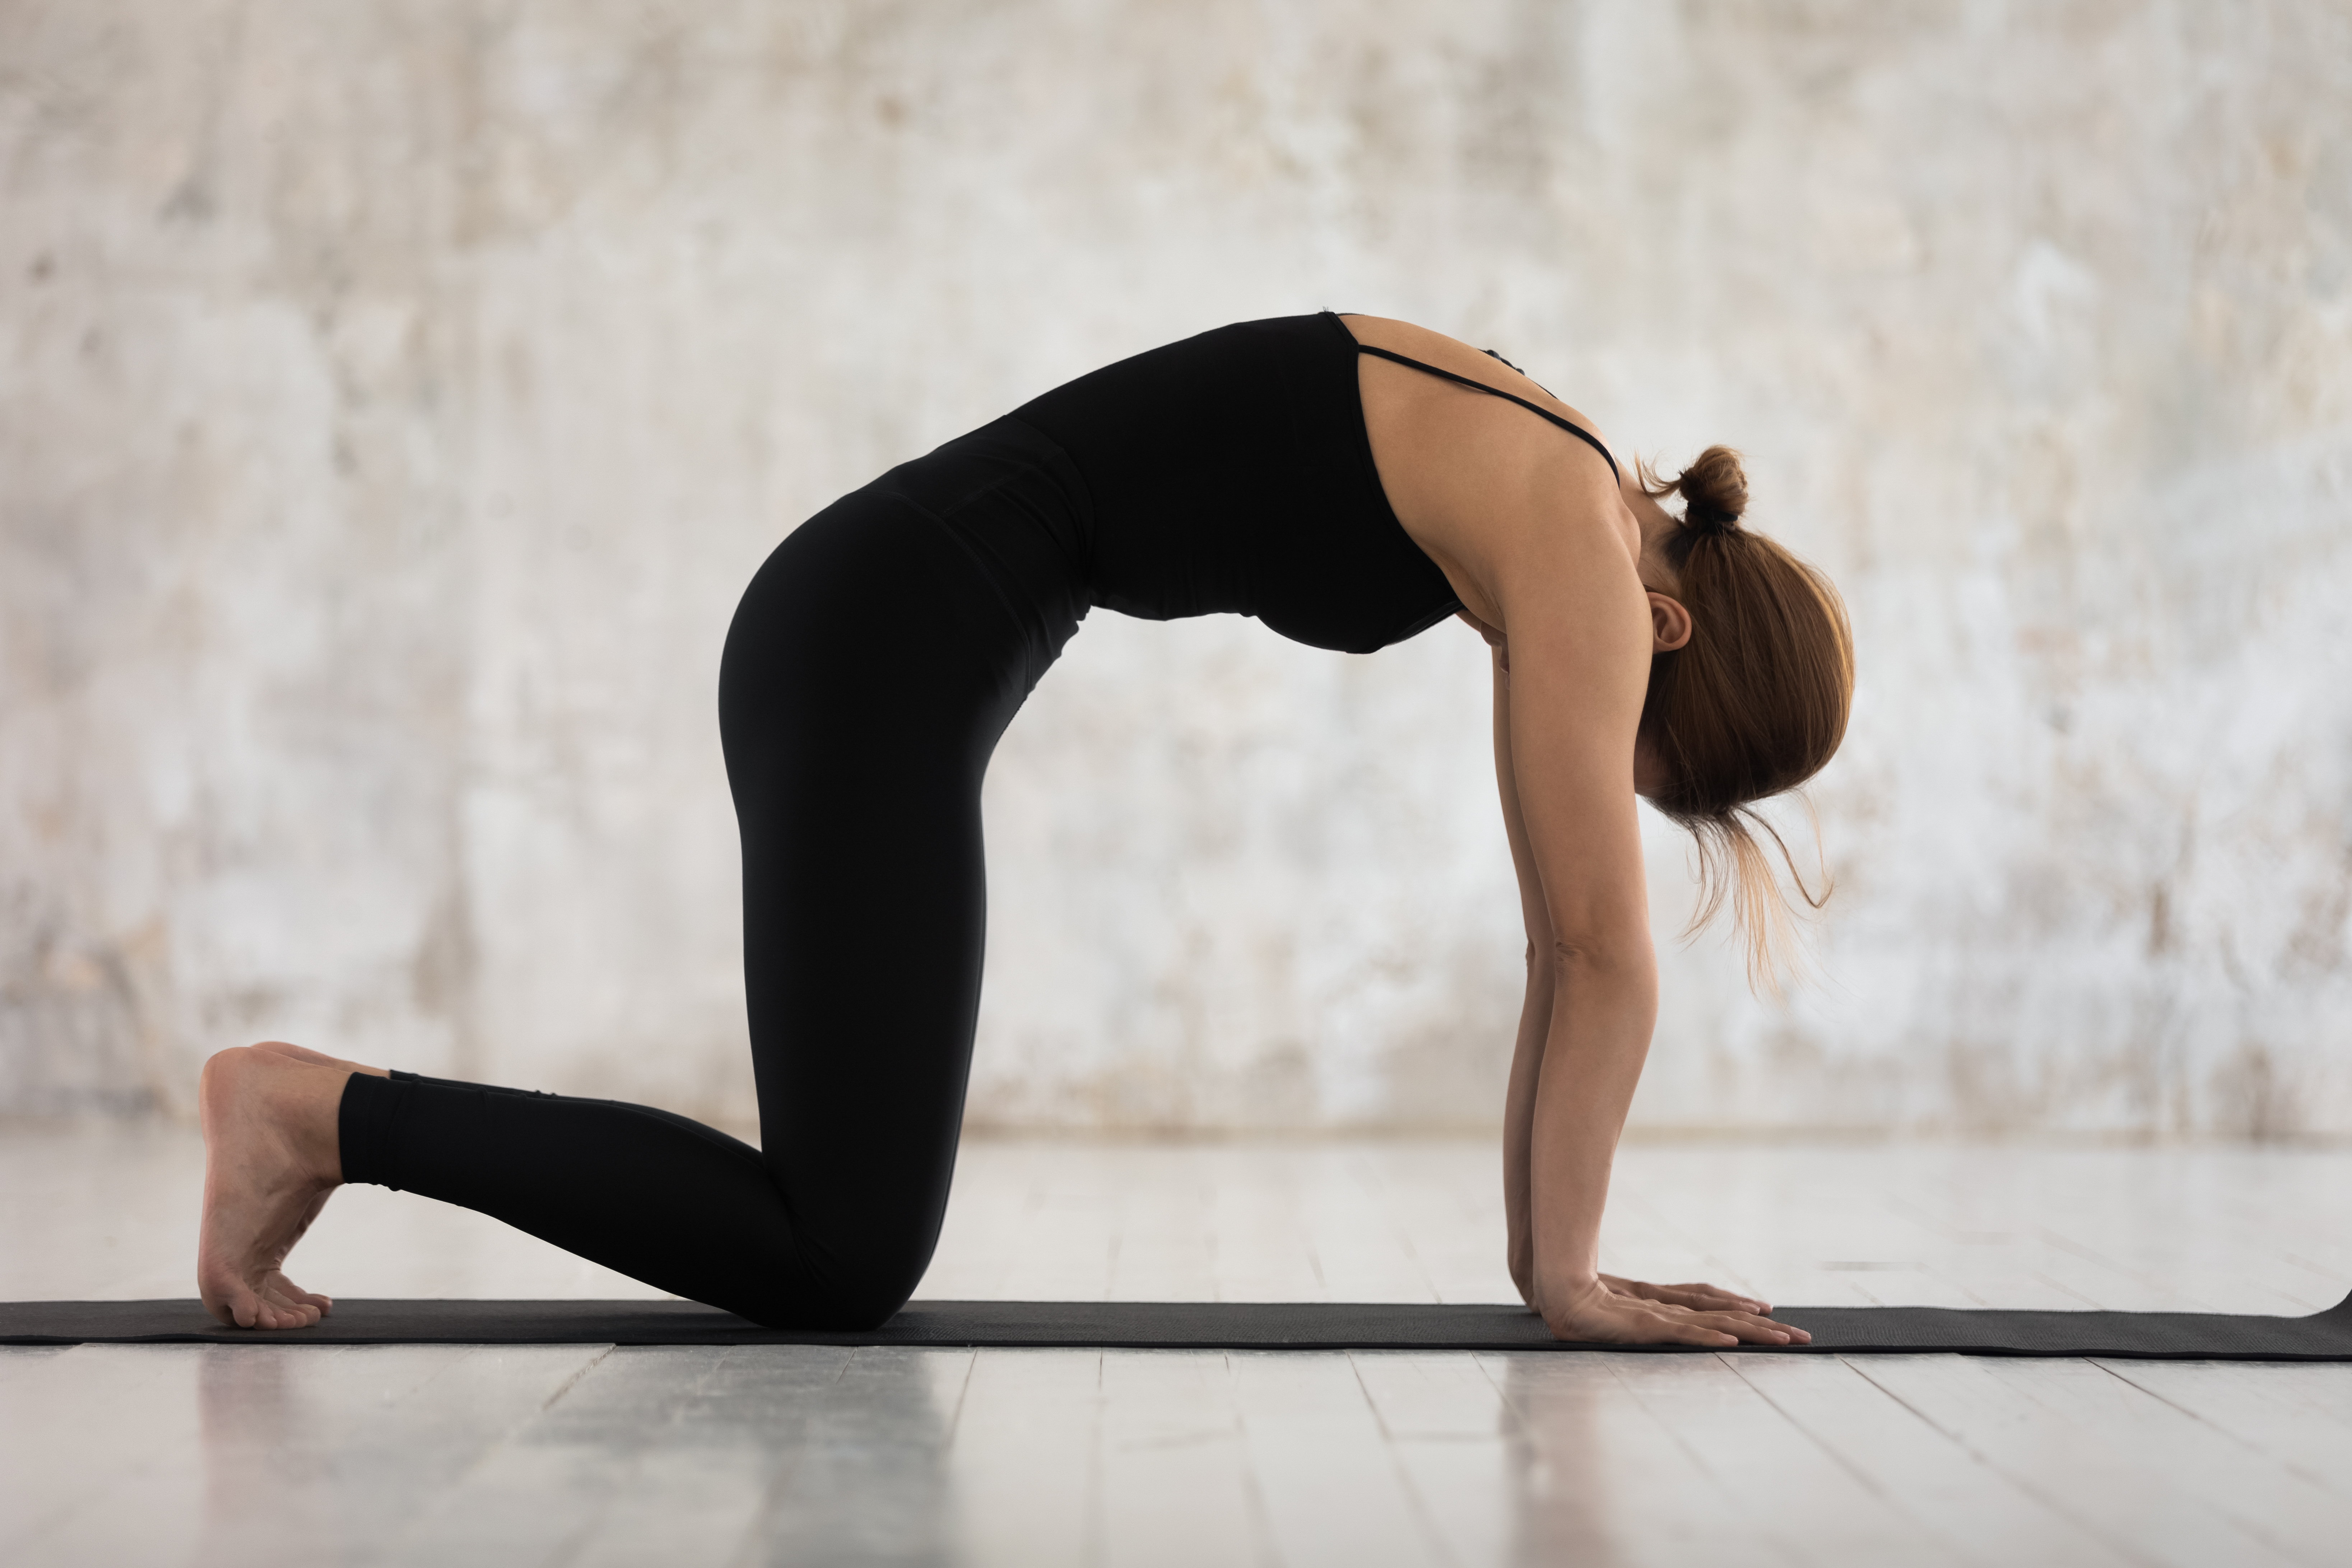
The Cat-Cow Stretch is a staple in yoga exercises for lower back pain, helping to ease tension and improve flexibility. By alternately stretching and compressing the spine, it improves spinal flexibility and stimulates and massages the organs in the stomach. This pose also helps improve posture and balance, key factors in preventing and managing lower back pain. Regular practice of Marjaryasana-Bitilasana can lead to a more supple and less painful back, making it a valuable addition to any yoga routine focused on back health.
How to Do It:
- Start by positioning yourself on a yoga mat in a tabletop stance. This means placing your hands directly under your shoulders and your knees under your hips, keeping your spine neutral.
- As you inhale, slowly arch your back downwards, lifting your head and tailbone towards the ceiling. This is the Cow Pose (Bitilasana). In this position, focus on gently stretching your abdomen and neck.
- Transition into Cat Pose (Marjaryasana) by exhaling and rounding your spine upwards. Tuck your chin towards your chest and draw your navel towards your spine. Imagine pulling the middle of your back towards the ceiling.
- Continue this fluid movement for several cycles. Each movement should be slow and deliberate, matching the rhythm of your breath. With each inhale, arch your back into Cow Pose and round into Cat Pose with each exhale.
- Pay attention to the movement of your spine. Feel each vertebra moving, enhancing your spine's flexibility and mobility.
3. Cobra Pose (Bhujangasana)
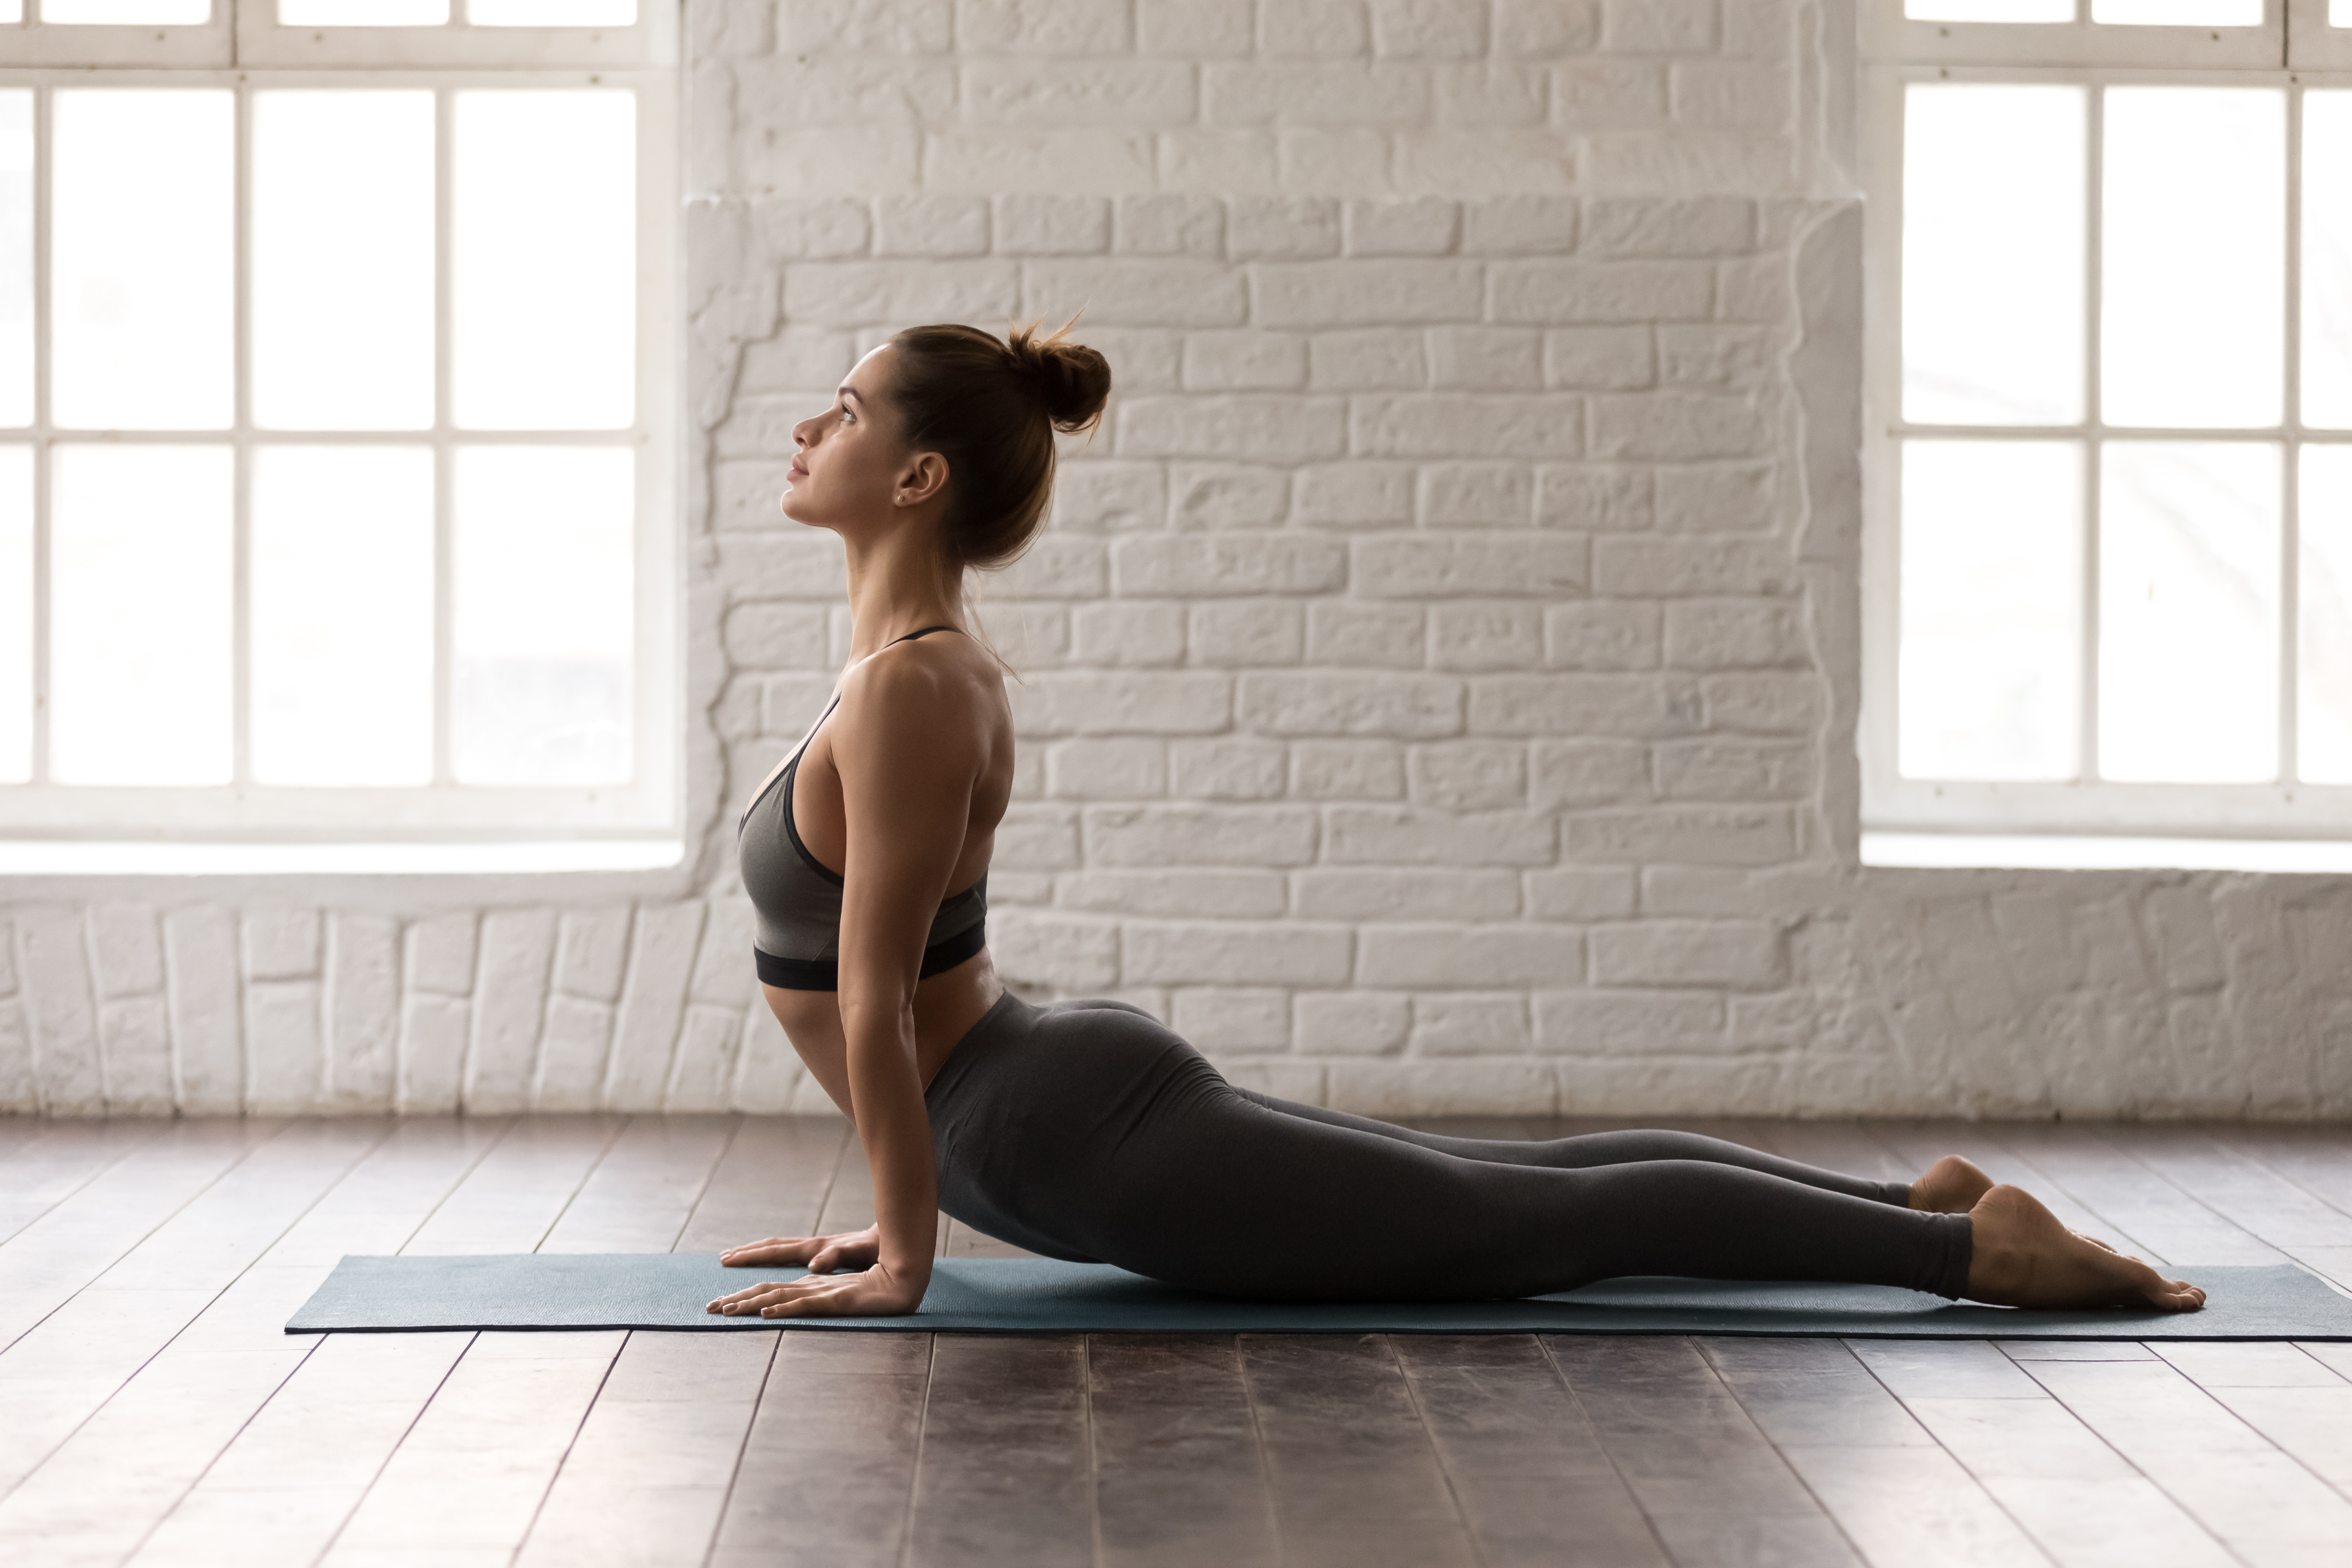
Cobra Pose is a fantastic asana in yoga for lower back pain treatment at home. It provides a deep stretch to the muscles in the lower back, benefiting those suffering from muscle tension or spinal issues. By strengthening the muscles in this area, Bhujangasana maintains proper posture and spinal alignment. This pose improves flexibility in the spine and can stimulate abdominal organs, boosting digestion and relieving stress - factors that indirectly impact back health. Regular practice of Cobra Pose can be a significant step towards achieving a stronger, more flexible, and pain-free lower back.
How to Do It:
- Begin by lying face down on your yoga mat. Place your hands under your shoulders, with your palms flat on the ground. Keep your elbows close to your sides, pointing towards your feet.
- Extend your legs behind you, the tops of your feet pressing against the mat. Your feet should be hip-width apart, and your toes should be pointing straight back.
- As you inhale, gently lift your chest off the mat, straightening your arms as much as comfortable. Ensure you lift through your spine and engage your lower back muscles rather than just using arm strength.
- Keep your shoulders relaxed and away from your ears and your gaze directed forward or slightly upward, ensuring your neck remains a natural extension of your spine.
- Hold the pose for a few deep breaths. With each inhalation, lift a bit more; try to ease tension in your lower back with each exhalation.
- To release, exhale and slowly lower your chest and forehead back to the mat.
4. Downward-Facing Dog (Adho Mukha Svanasana)
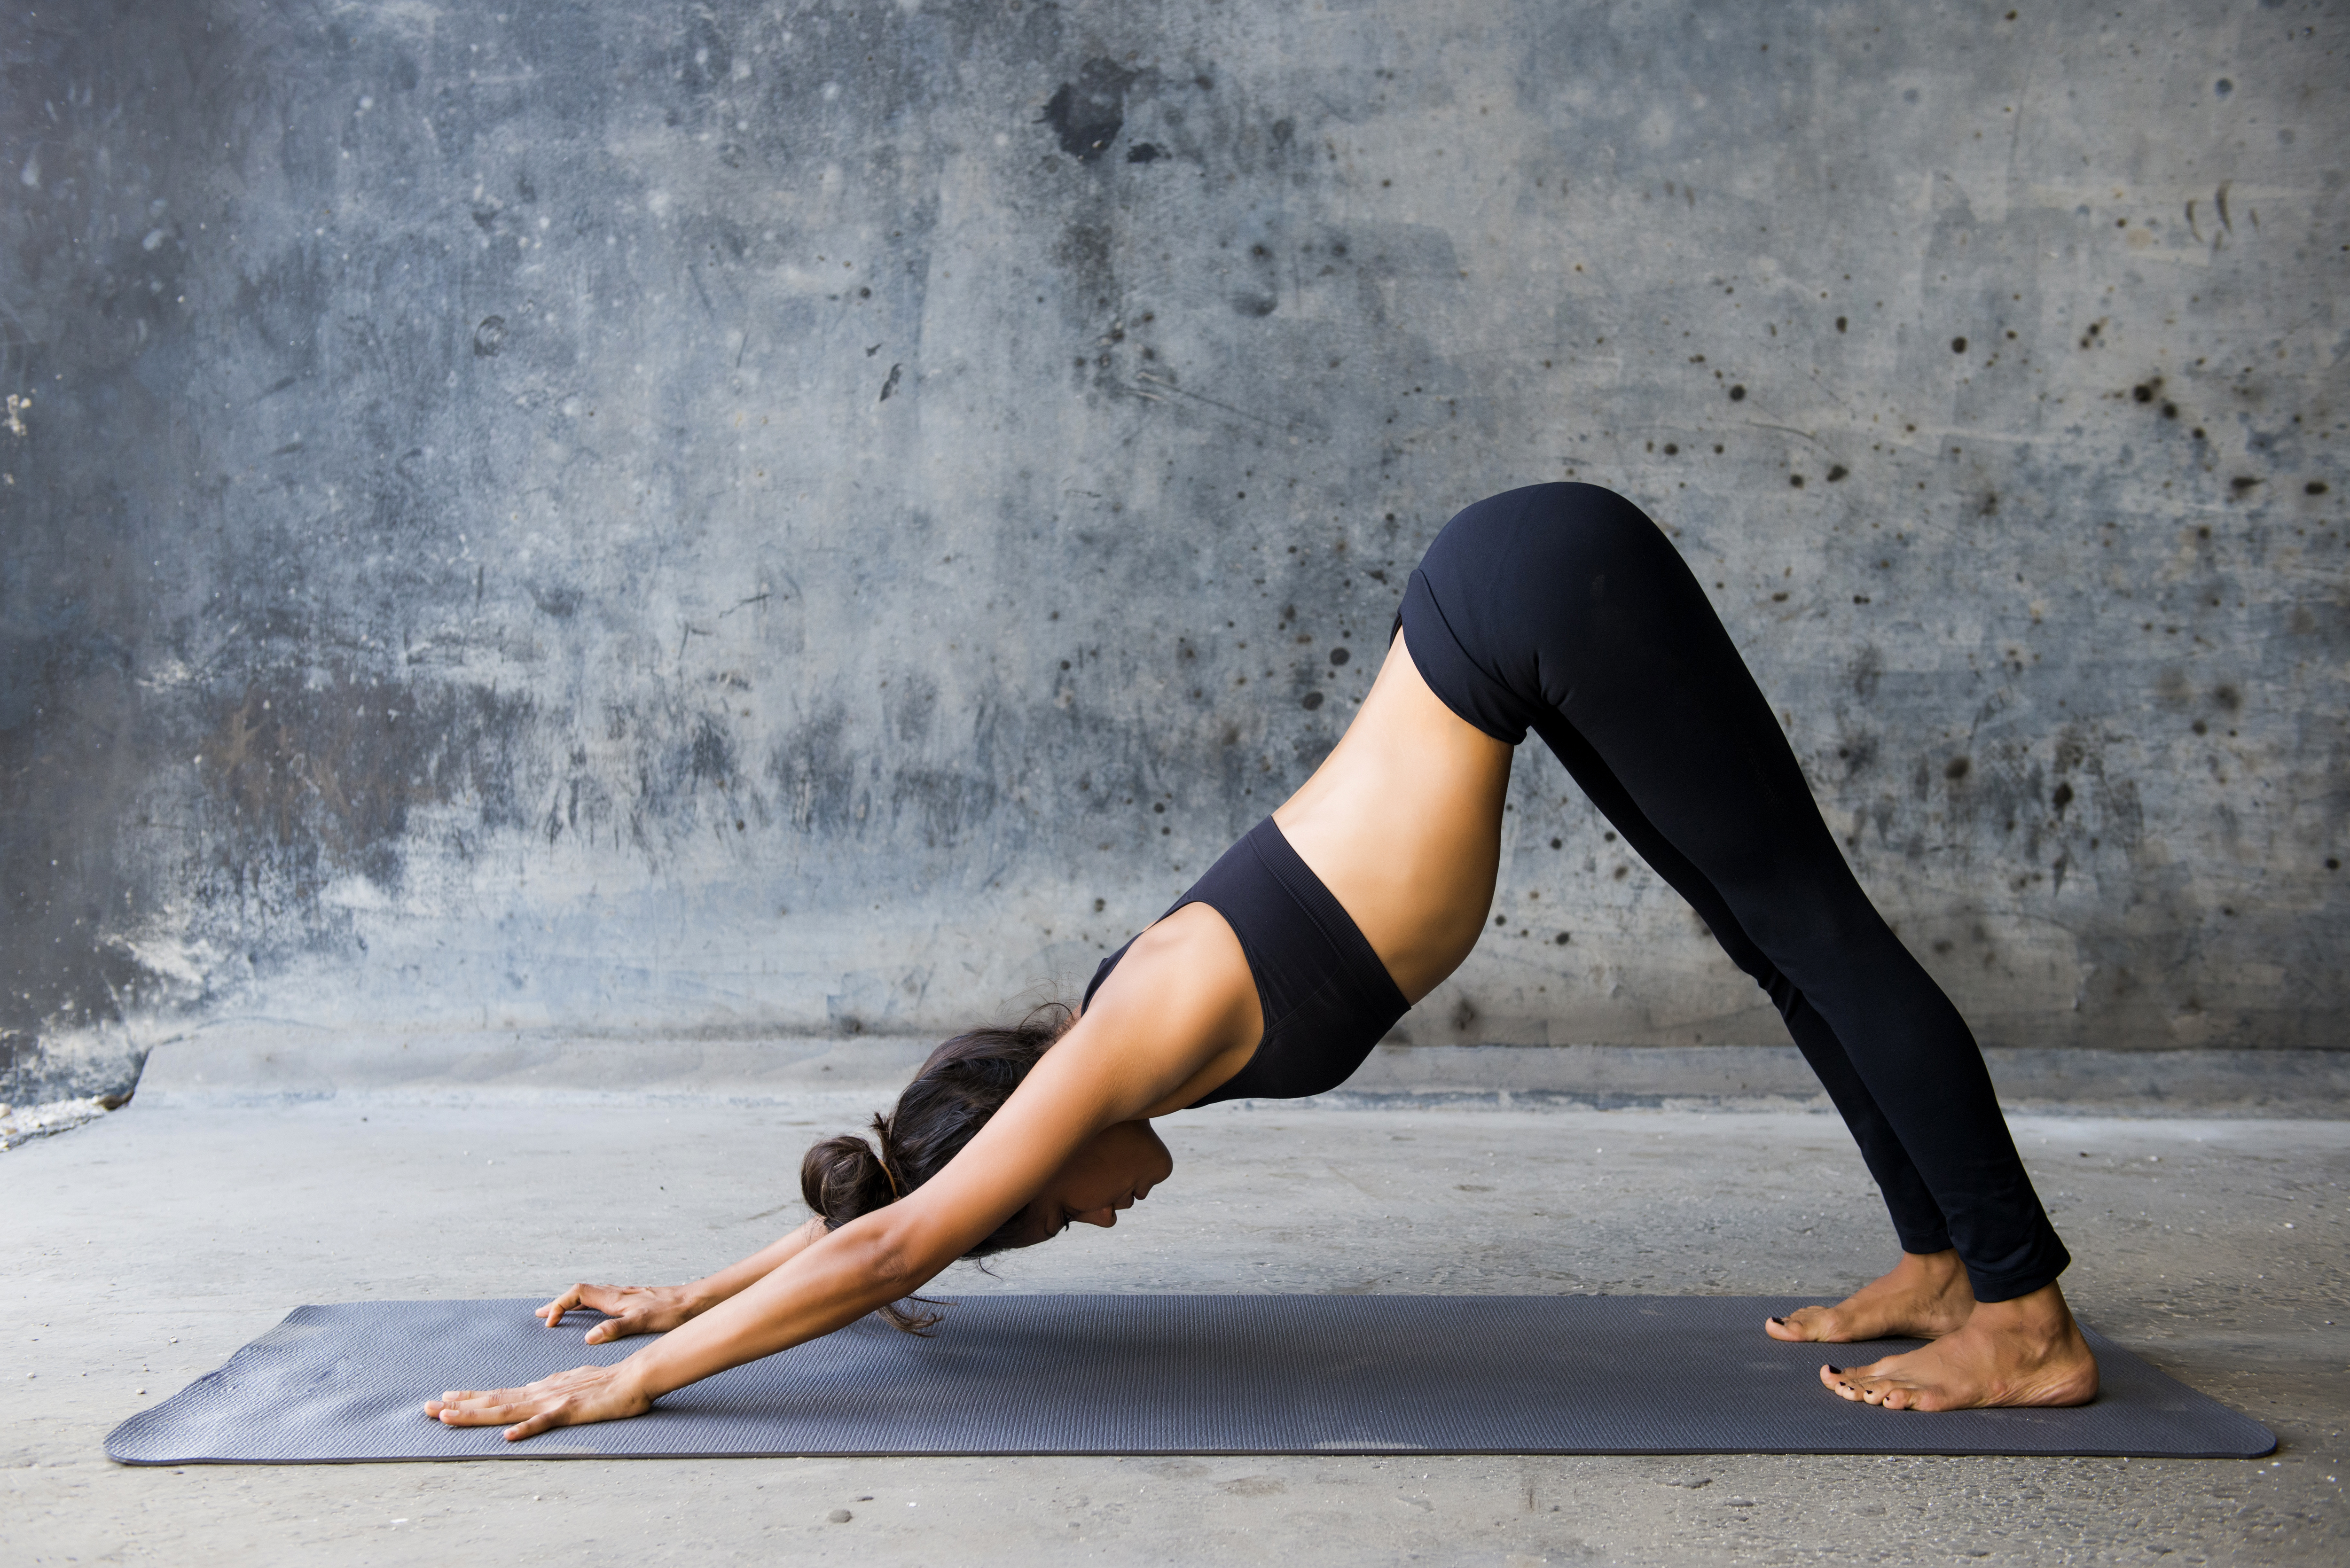
Downward-Facing Dog is one of the most effective yoga stretches for back pain, providing relief and improving flexibility. This pose offers a full-body stretch, particularly on the back - from the neck to the lower spine. Lengthening the spine helps relieve tension in the back muscles and improves overall spinal flexibility. This asana also strengthens your arm and leg muscles and, when practised regularly, can contribute to a better posture.
How to Do It:
- Begin on your yoga mat in a hands-and-knees position, ensuring your knees are directly below your hips and your hands slightly forward of your shoulders.
- Spread your palms wide and tuck your toes under.
- Exhale and lift your knees away from the floor, initially keeping the knees slightly bent and the heels lifted away from the floor.
- Gradually straighten your legs, but don’t lock your knees, and gently bring your heels towards the floor.
- Push your hands firmly into the mat and lengthen your spine, drawing energy from your hands through your arms and down your back.
- Keep your head between your arms, avoiding letting it hang, to maintain a straight line from your hands to your tailbone.
- Hold this pose for a few deep breaths, feeling the stretch along your entire spine and the back of your legs.
5. Thread the Needle Pose (Urdhva Mukha Pasasana)
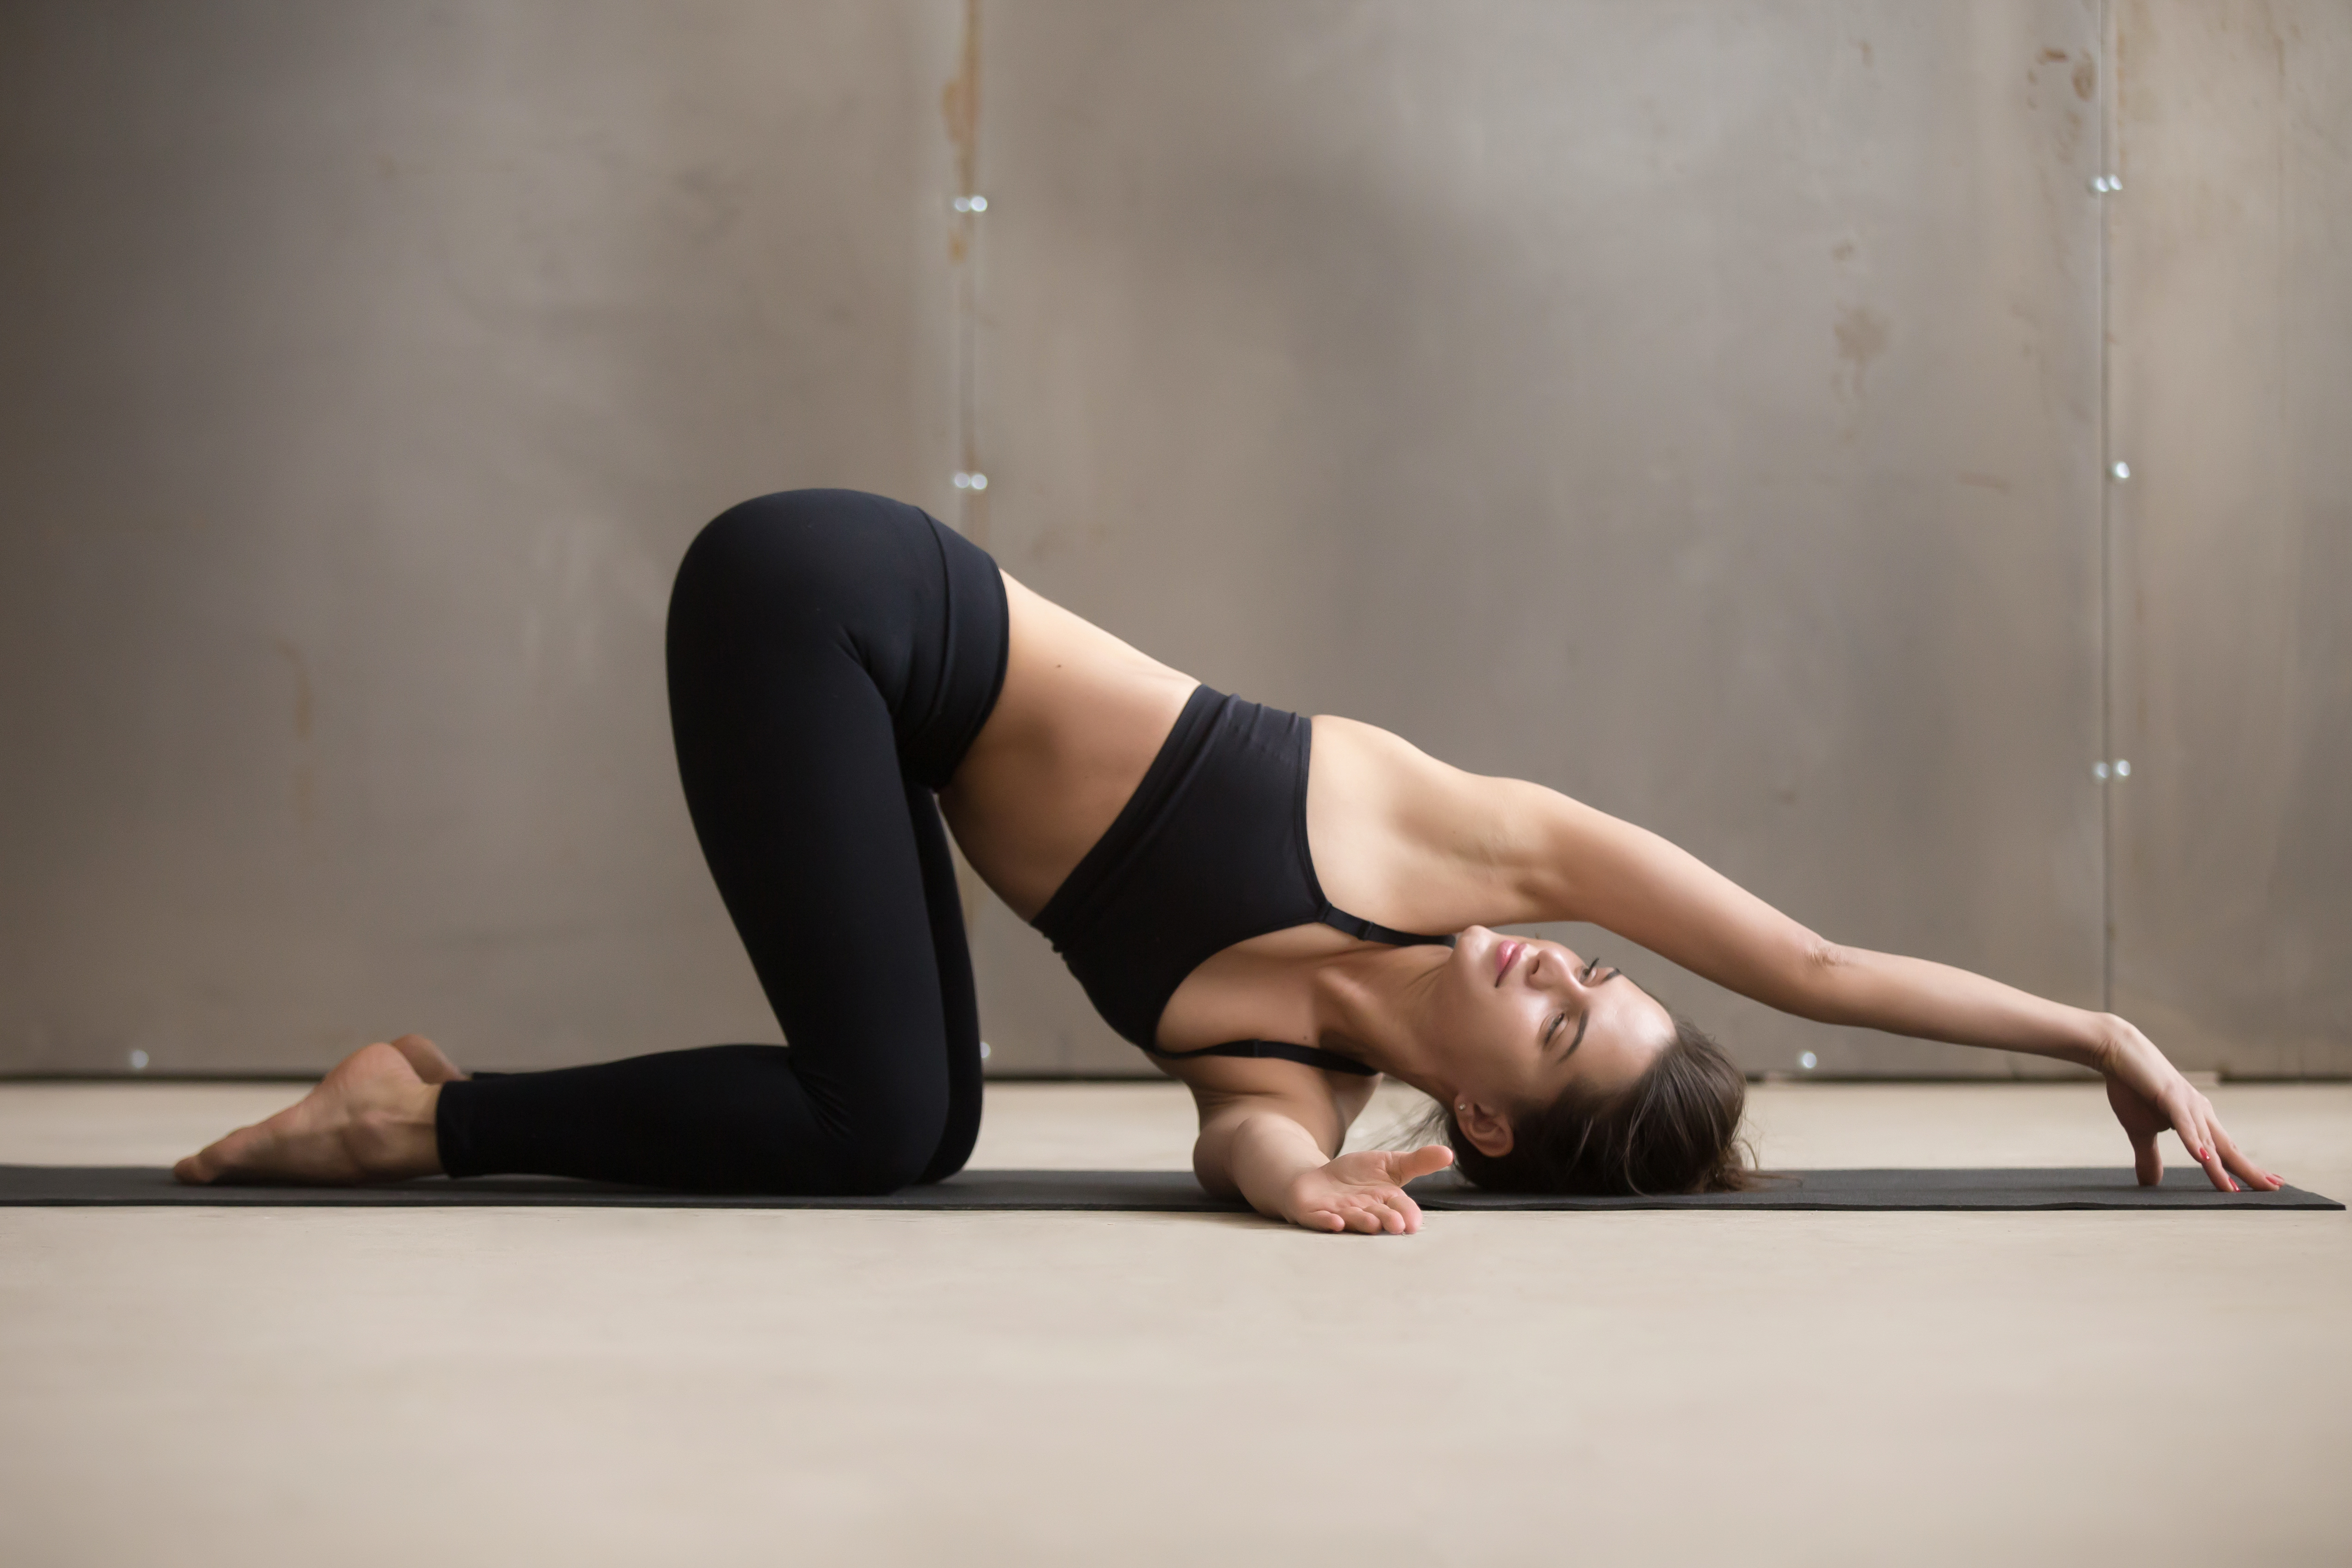
Ideal for those wanting to relieve back pain fast at home, the thread the needle pose offers immediate relief. It provides a deep stretch to the shoulders, neck, and upper back, areas often tight from poor posture or prolonged sitting. This pose helps release knots and tension in the upper back and can improve overall spinal flexibility. The gentle twisting also encourages a healthy range of motion in the spine, which is great for relieving stress and fatigue. Regular practice of Urdhva Mukha Pasasana enhances upper back mobility and reduces discomfort.
How to Do It:
- Start by getting into a tabletop position on your yoga mat. Ensure your knees are directly below your hips and your wrists align with your shoulders.
- Keep your back flat and gaze downward to maintain a neutral spine.
- Lift your right hand and reach it towards the ceiling, opening your chest to the right side for a gentle twist.
- As you exhale, slide your right arm under your left arm, with your palm facing up. Gently lower your right shoulder and the side of your head onto the mat.
- Keep your left hand grounded for support, or for a deeper stretch, extend it forward or wrap it behind your back.
- In this twisted position, focus on releasing tension in your upper back and shoulders. Take several deep breaths, allowing the stretch to penetrate deeper with each exhale.
- Gently unwind, return to the tabletop position, and repeat on the other side.
6. Seated Forward Bend (Paschimottanasana)
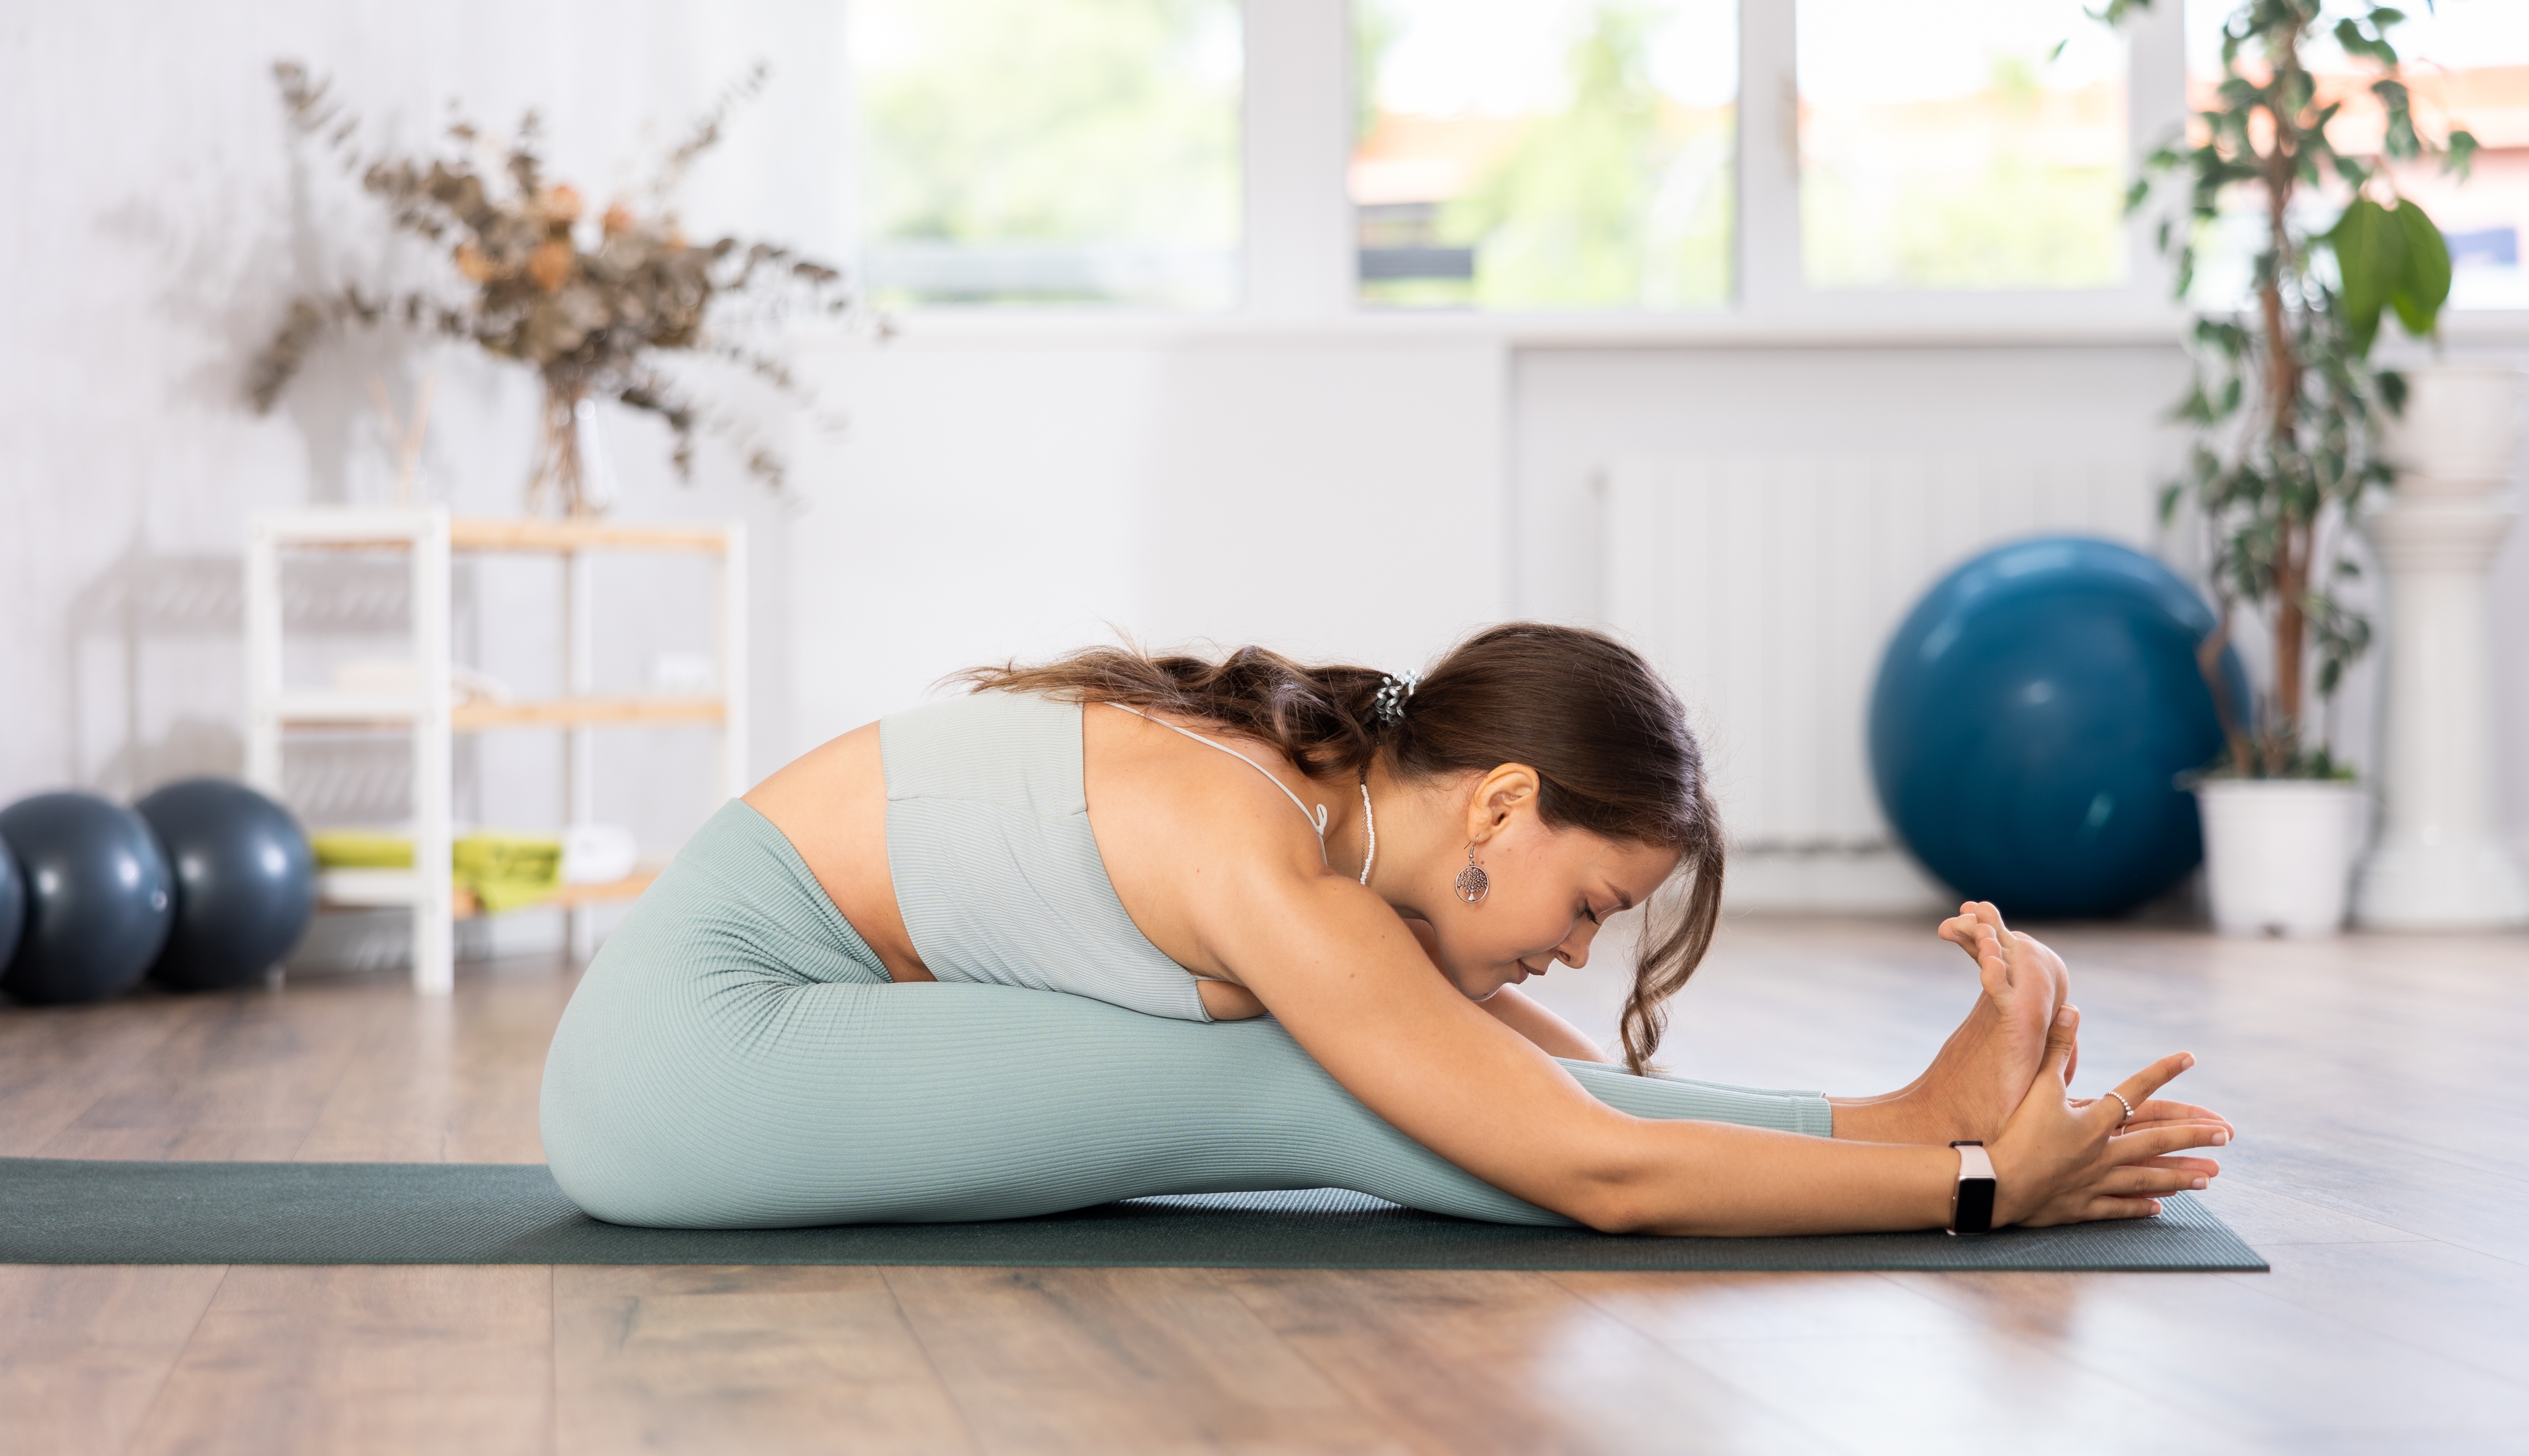
The Seated Forward Bend is a highly effective pose for targeting upper back pain and tension, as well as the entire back. This forward bend stretches the spine and hamstrings, reducing upper and lower back tightness. It's particularly helpful for releasing tension in the muscles along the spine, calming the mind and reducing stress. Regular practice of this asana can improve flexibility in the back and hamstrings, promoting better posture and easing discomfort in the back.
How to Do It:
- Begin by sitting on your yoga mat with your legs extended straight in front of you. Sit tall, ensuring your spine is erect, and your feet are flexed.
- Inhale and raise your arms above your head, lengthening your spine.
- As you exhale, hinge at your hips and lean forward, reaching towards your toes. Keep your spine long and avoid rounding your back.
- If you can't reach your toes, hold onto your shins or use a yoga strap around your feet for support. The goal is to feel a stretch along your back, not to strain.
- Let your head hang gently, relaxing your neck and shoulders.
- Hold this position for several deep breaths, deepening the stretch with each exhalation. With each inhale, lengthen the spine; try to fold a bit deeper with each exhale.
7. Supine Spinal Twist (Supta Matsyendrasana)
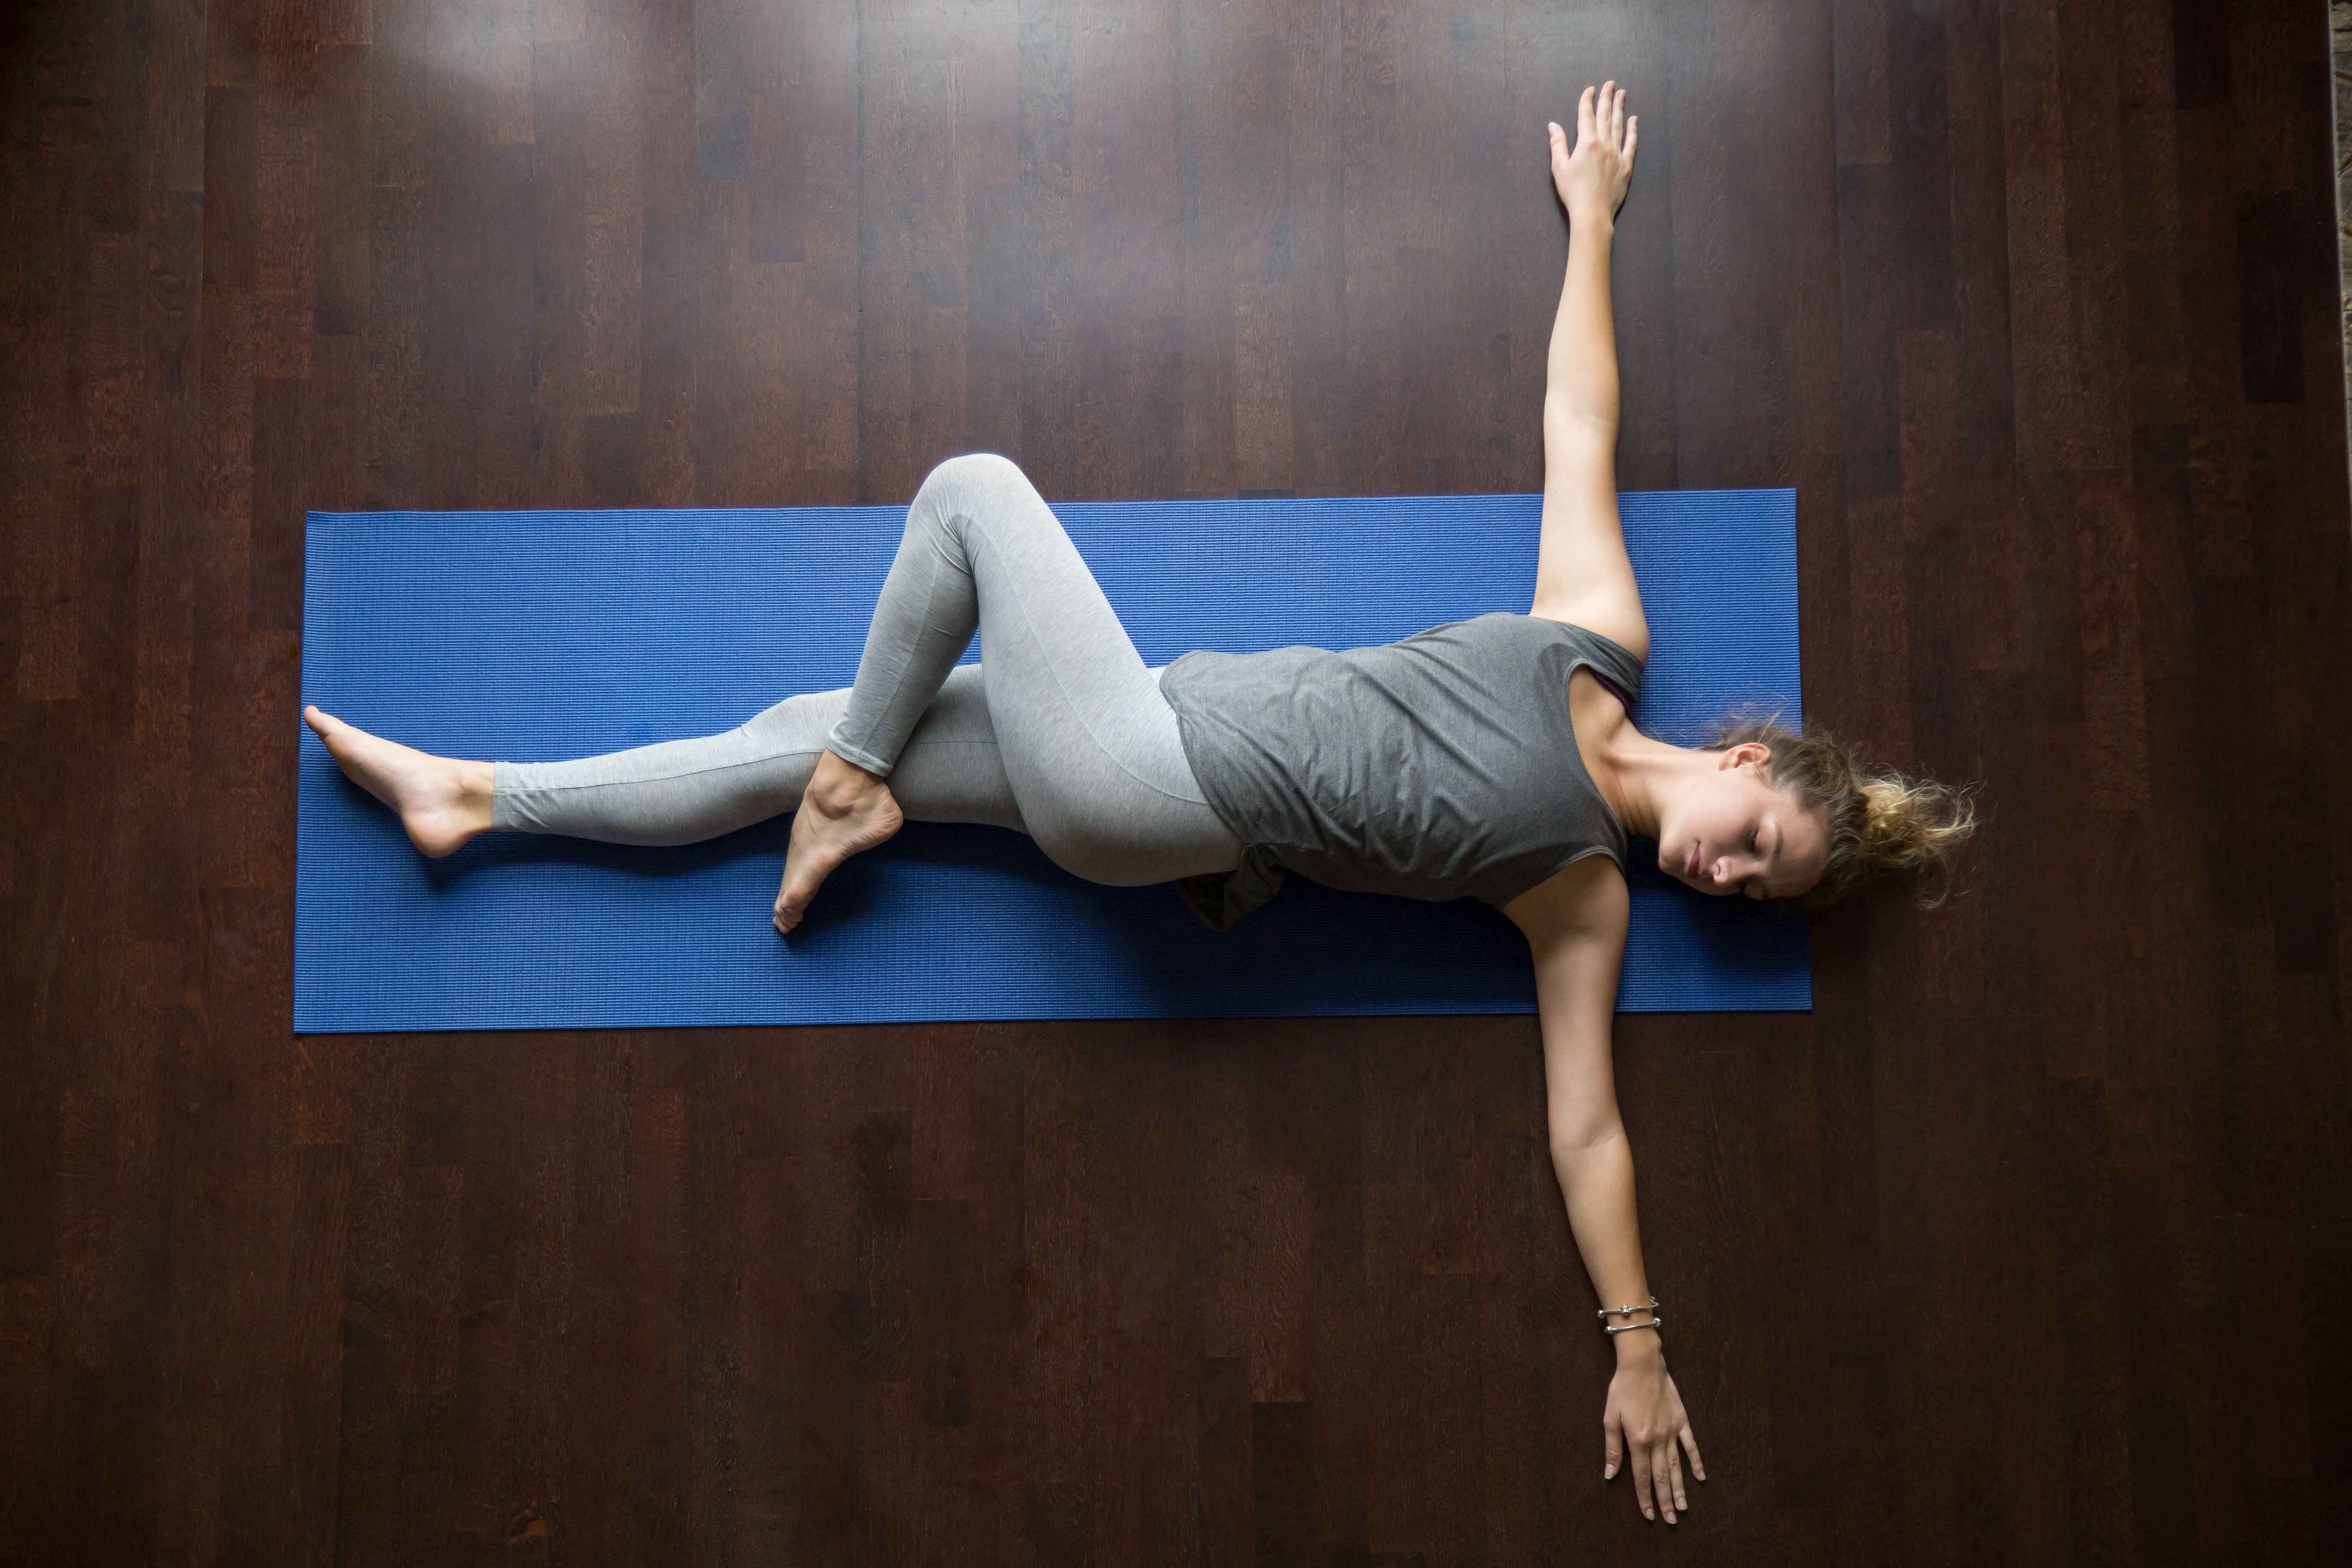
The Supine Spinal Twist is an exceptional pose for those seeking yoga for lower back pain. This pose offers a gentle yet effective way to ease chronic discomfort in the lower back. It helps loosen and stretch the muscles around the spine, relieving tension and promoting better spinal mobility. The twisting motion of the pose also helps massage the abdominal organs, improving digestion and reducing stiffness in the back. Regular practice of this twist can contribute to a healthier, more flexible spine and is a key part of a holistic approach to managing lower back pain.
How to Do It:
- Begin by lying flat on your back on a comfortable yoga mat. Bend your knees and place your feet flat on the floor, hip-width apart.
- Extend your arms to the sides in a T-shape, palms facing up, to stabilise your upper body.
- As you exhale, gently lower your knees to the left side of your body, keeping them stacked. Adjust your hips so they're stacked as well, ensuring the twist originates from your lower back and not just your legs.
- Turn your head to the right, gazing over your right shoulder. This action increases the twist and stretch along your spine and neck.
- Keep your shoulders pressed down into the mat to deepen the spinal twist.
- Hold the position for several breaths, focusing on relaxing into the twist with each exhalation.
- Gently bring your knees and head back to the centre, and repeat the twist on the opposite side.
Frequently Asked Questions
Should I Do Yoga If My Back Hurts?
For most types of back pain, yoga can provide relief by stretching and strengthening the back muscles, improving posture, and enhancing core stability. It's essential, however, to identify the type of back pain and its cause before starting a yoga routine. Gentle, restorative yoga poses are often recommended for back pain, avoiding positions that may exacerbate the issue. Consult with a healthcare provider before starting yoga for back pain, and consider seeking guidance from a qualified yoga instructor who can tailor poses to your specific condition. Remember, listening to your body and not pushing into painful positions is key.
How Often Should I Practice These Yoga Poses for Back Pain Relief?
Aim to practice these yoga poses about 3-4 times a week for optimal results. Consistency is key in yoga, and regular practice can lead to gradual and sustainable improvements in back pain.
Is Yoga Good for Arthritis in the Back?
Yoga can be beneficial for people dealing with arthritis in the back. This gentle practice focuses on slow, deliberate movements and controlled breathing, which can help increase flexibility, strengthen muscles, and reduce joint stress. Yoga poses that encourage flexibility and strength can help maintain spinal alignment and relieve pressure on the affected areas. However, it's important to approach yoga cautiously and preferably under the guidance of an instructor experienced in working with arthritis patients. Modifying poses to suit individual needs and avoiding overexertion are key to safely incorporating yoga into an arthritis management plan.
Can Yoga Poses be Modified for Beginners or Those with Severe Back Pain?
Yoga is a flexible practice, and most poses can be modified to suit your comfort level and physical limitations. Using props like yoga blocks, bolsters, and straps can make poses more accessible. It's always best to start gently, especially if you're a beginner or have severe back pain.
Recommended for you!
Best Sellers


Are There Any Precautions I Should Take While Doing Yoga for Back Pain?
There are a few precautions to keep in mind when practising yoga for back pain:
- Avoid any movements or poses that cause pain or discomfort.
- Move into each pose slowly and mindfully to avoid strain.
- If you have a specific back condition, consult a healthcare provider before beginning a yoga practice.
- Listen to your body, and do not push it beyond its limits.
Is it Normal to Feel Sore After Practicing Yoga for Back Pain?
Some mild soreness is normal as your body adjusts to new movements, especially if you're new to yoga. However, sharp or intense pain is not normal. If you experience this, stop the practice and consult a healthcare professional.
Can Yoga Alone Cure Back Pain?
While yoga can significantly help manage and reduce back pain, it's often most effective when combined with other treatments and lifestyle changes. These include physical therapy, regular exercise, and stress management techniques.
How Long Before I See Improvement in My Back Pain?
This varies from person to person, depending on the nature and severity of your back pain and the frequency and consistency of your yoga practice. Some people may notice improvements within a few weeks, while others may take longer.
Learn Yoga with Centre of Excellence
Our Yoga Diploma Course is your comprehensive pathway to mastering yoga techniques, understanding its philosophy, and applying its principles for a healthier, more balanced life.
What You'll Gain:
- In-Depth Knowledge: Explore the foundational aspects of yoga, from its ancient origins to its modern-day applications. Understand the various styles of yoga, the anatomy of key poses, and the philosophy behind this timeless practice.
- Practical Skills for Holistic Health: Learn effective yoga sequences and poses tailored for back pain relief and overall wellness. Enhance your strength, flexibility, and mental clarity through guided practice.
- Personal Wellbeing and Balance: Equip yourself with tools to create harmony in your daily life. Yoga's emphasis on breathwork, mindfulness, and body awareness can significantly improve your emotional and physical well-being.
Special Offer:
We're excited to present our Yoga Diploma Course at an exclusive price of only £29, saving you over £100!